Arduino IDE
Load your own Arduino sketch onto any DUELink module's on-board STM32. The module runs your code directly — full speed, full hardware access.

100s of *duino options
Every DUELink module is an Arduino-compatible board with a built-in feature — a *duino with a fan, a *duino with a 7" display, a *duino with USB Host, and so on, across every shape in the catalog.

No board + shield + sensor stacks: grab the module that already does what you need and program it in Arduino IDE — or, for full toolchain control, in bare-metal C++ using STM32CubeIDE, Keil, or any other ARM toolchain.
What you get (and what you give up)
Loading an Arduino sketch replaces the default DUELink firmware on that module. Two things change:
- You get full control. Every pin on the STM32 is yours. Standard Arduino libraries work. You can step through code with SWD if you want.
- You give up plain-text commands. The module no longer responds to
RelayOn(2)or any other DUELink command — you're now driving the hardware directly in C++.
For simple modules (a light sensor, a button) this is easy — analogRead(), digitalRead(), done. For complex modules (USB Host, file storage, displays with their own chips) you'll need the module's schematic and the relevant component datasheets, same as building on any custom STM32 board. Most product pages include Arduino samples as a starting point.
To go back to text commands, reload the DUELink firmware.
What you need
- The latest Arduino IDE 2.x (download)
- Any DUELink module — every one ships with an on-board STM32C071
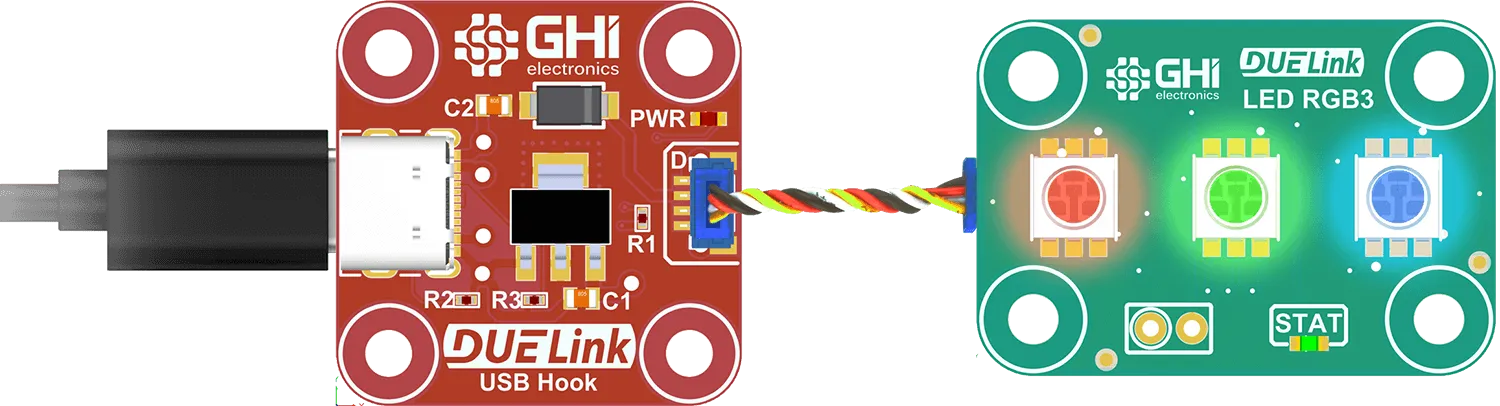
- A USB cable (or a USB Hook for modules without their own USB)
- STM32CubeProgrammer — Arduino IDE uses it under the hood for DFU upload
Setup
-
Install Arduino IDE 2.x from arduino.cc.
-
File → Preferences → in Additional boards manager URLs, add both lines:
https://github.com/ghi-electronics/duelink-libraries/raw/main/arduino/BoardManager/package_duelink_index.jsonhttps://github.com/stm32duino/BoardManagerFiles/raw/main/package_stmicroelectronics_index.json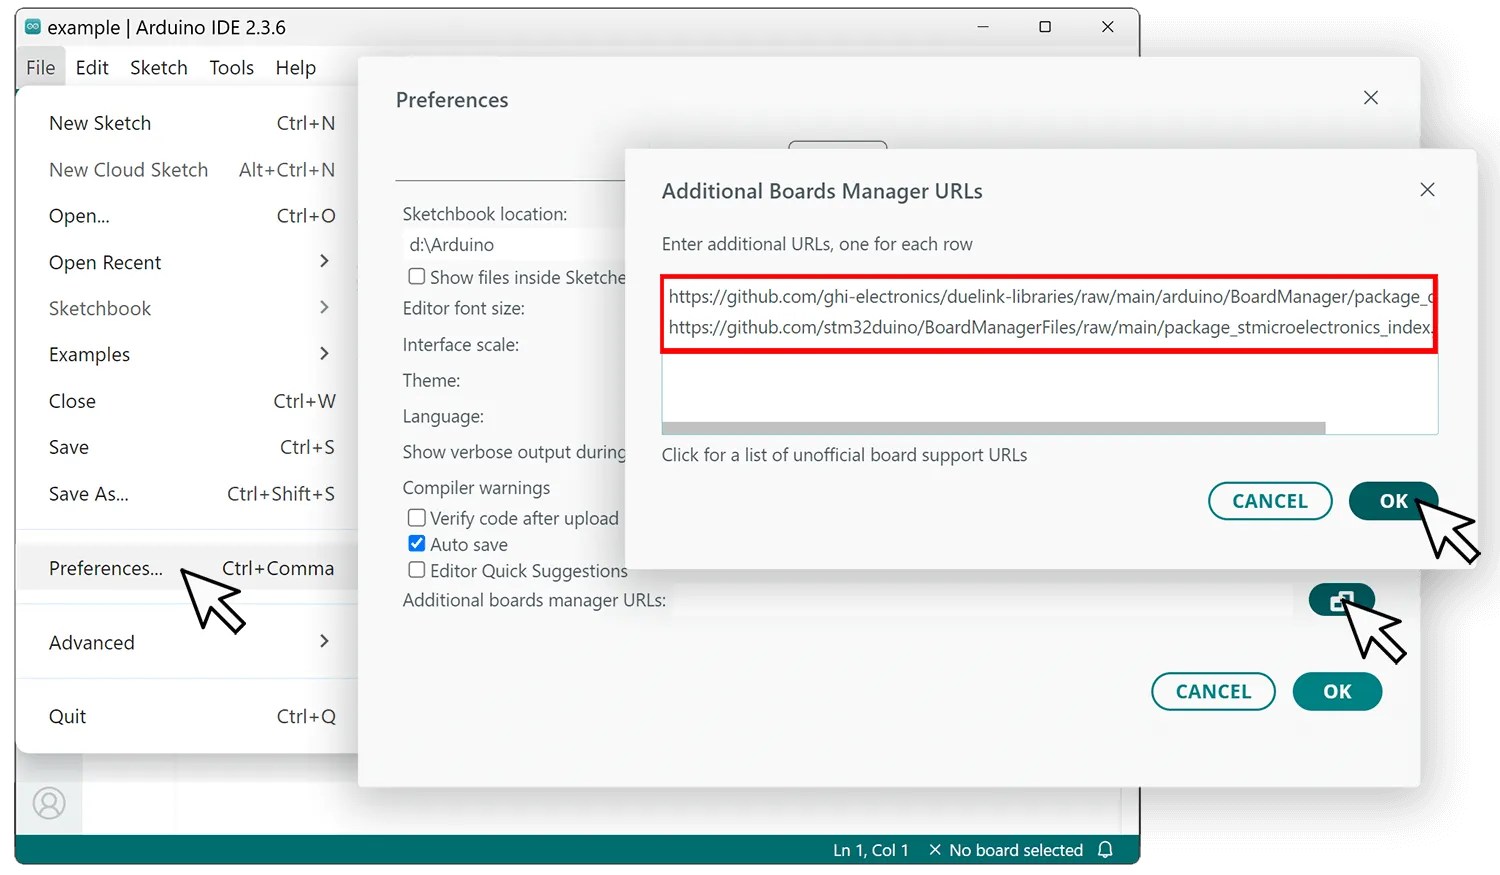
-
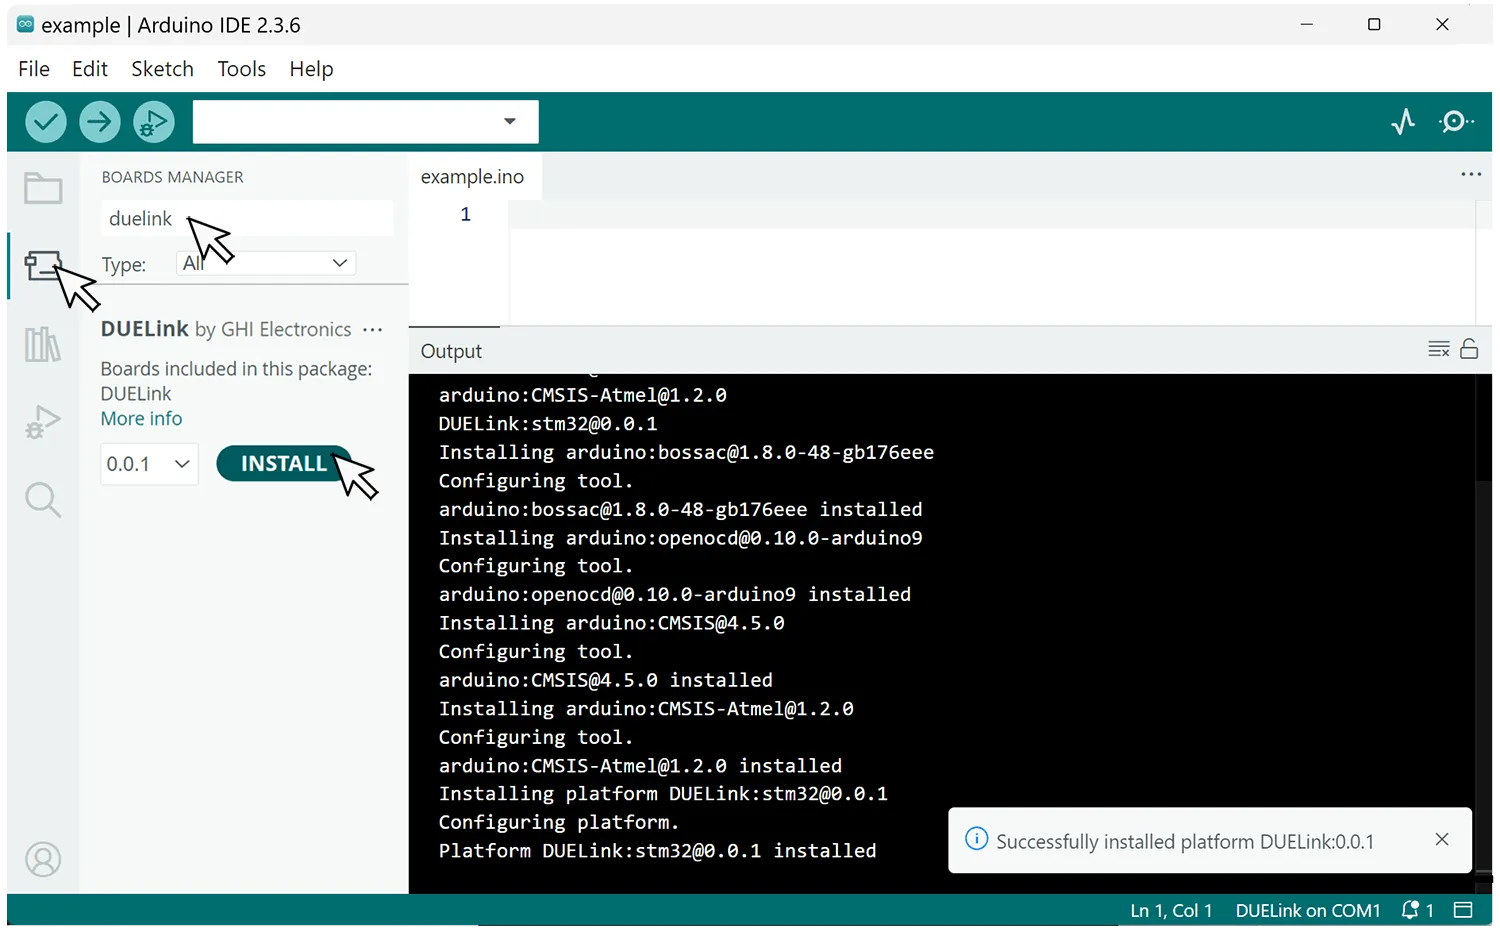
Tools → Board → Boards Manager → search duelink → Install. Install STM32 MCU based boards too if it's not already there.
-
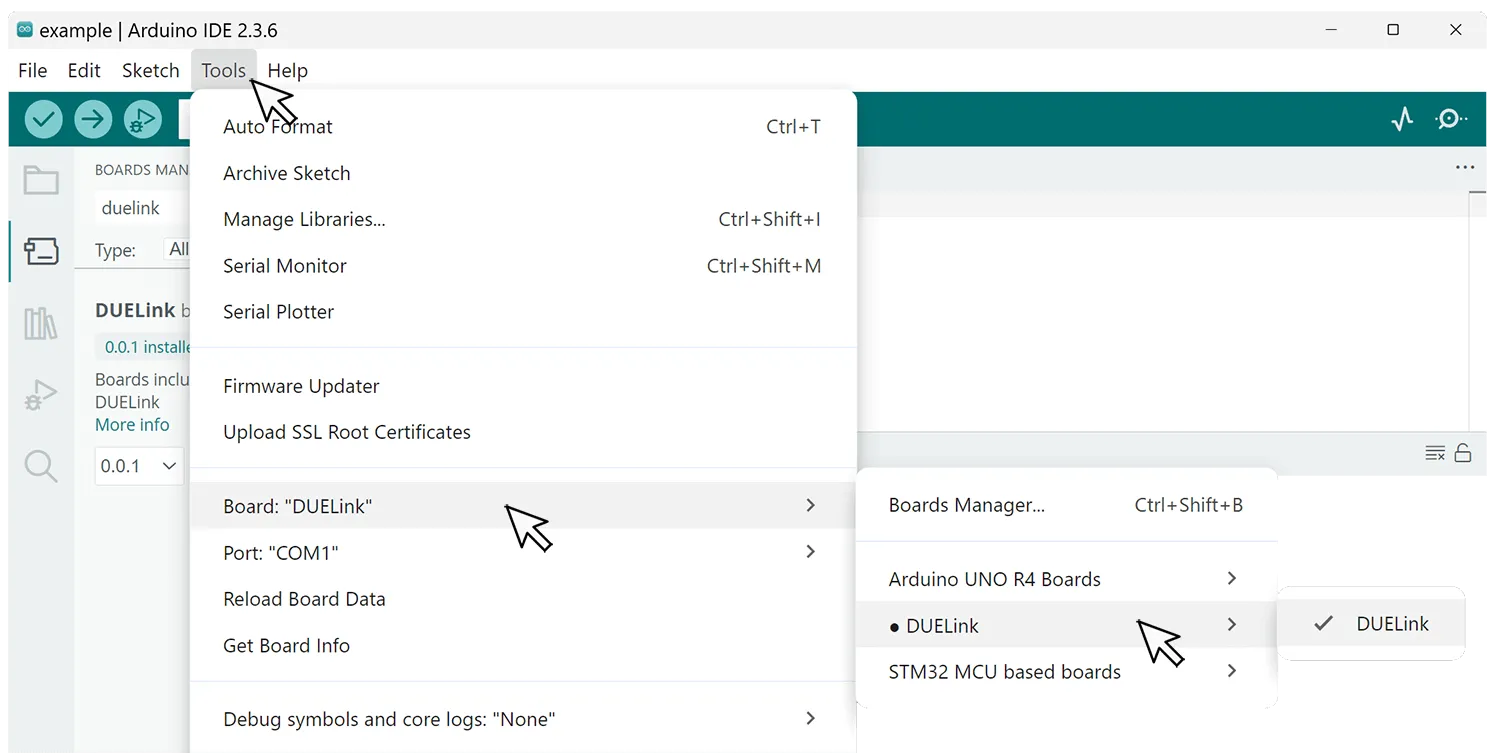
Tools → Board → DUELink → pick the entry that matches your module.
Your first sketch
Add this code to blink the status LED, which is connected to pin PB8.
void setup() {
  // initialize digital pin as an output.
  pinMode(PB8, OUTPUT);
}

void loop() {
  digitalWrite(PB8, HIGH);  // turn the LED on (HIGH is the voltage level)
  delay(1000);                      // wait for a second
  digitalWrite(PB8, LOW);   // turn the LED off by making the voltage LOW
  delay(1000);                      // wait for a second
}
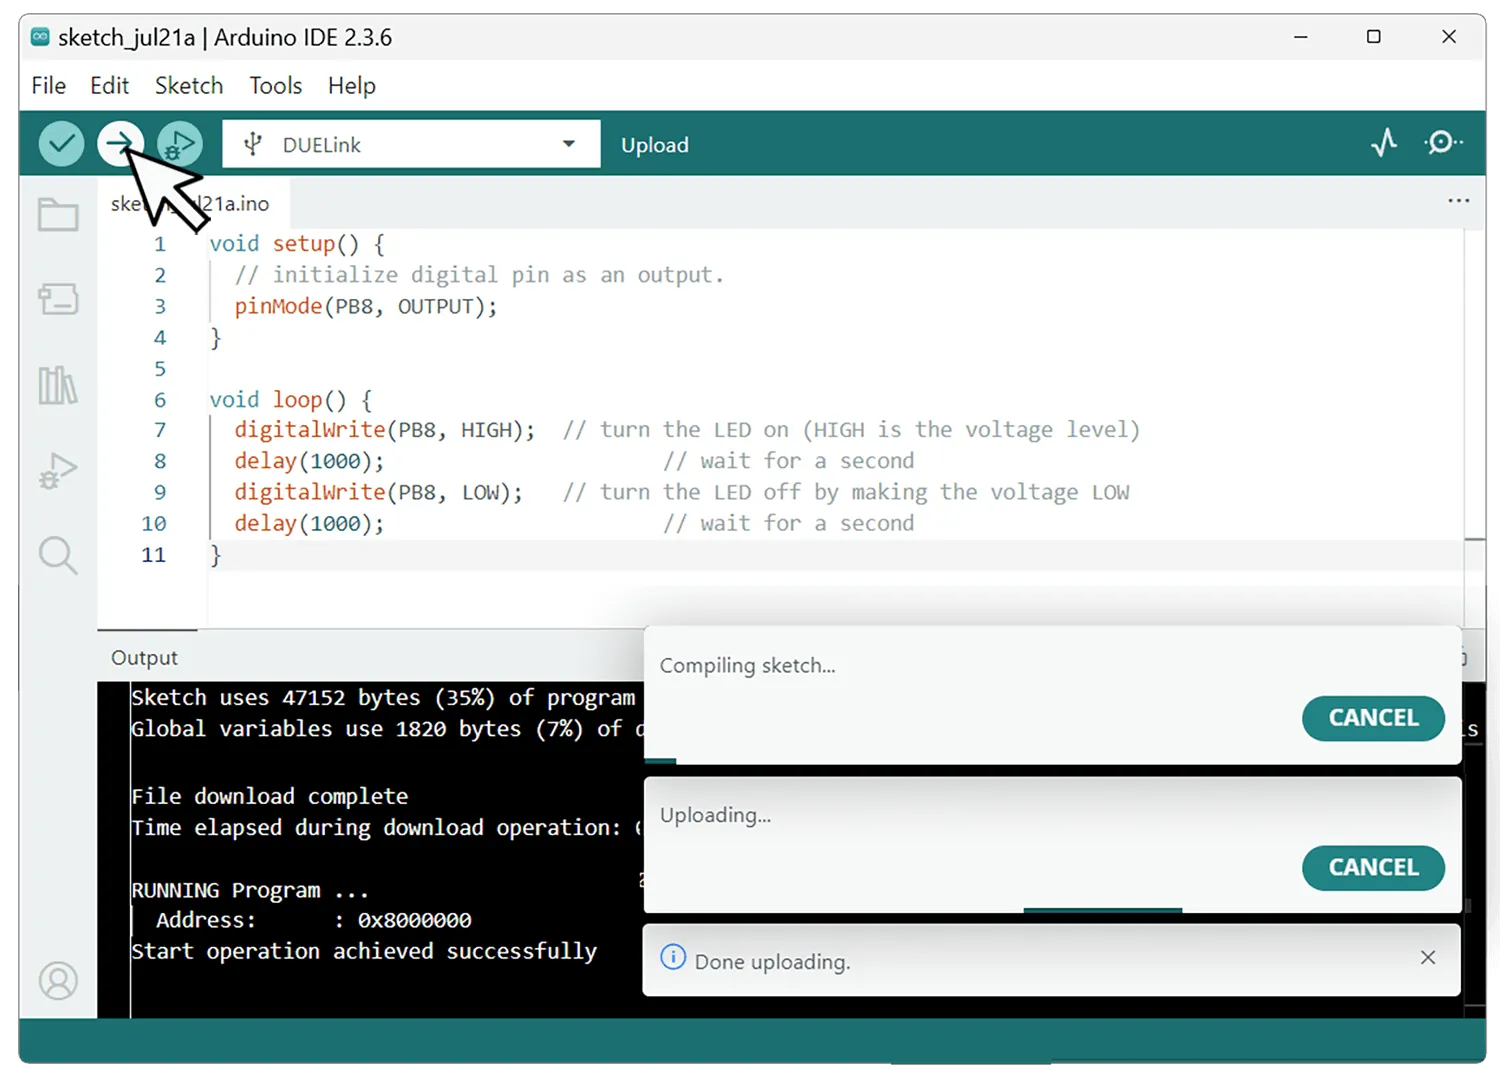
Use the Arduino Verify button to make sure the IDE is able to compile your program.
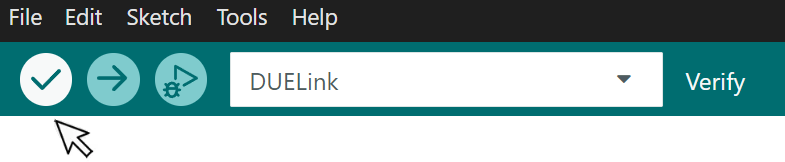
If all went well, you will see something like this:
Sketch uses 44608 bytes (34%) of program storage space. Maximum is 131072 bytes.
Global variables use 1820 bytes (7%) of dynamic memory, leaving 22756 bytes for local variables. Maximum is 24576 bytes.
Upload via DFU
USB DFU (Device Firmware Update) is used to load the compiled program.
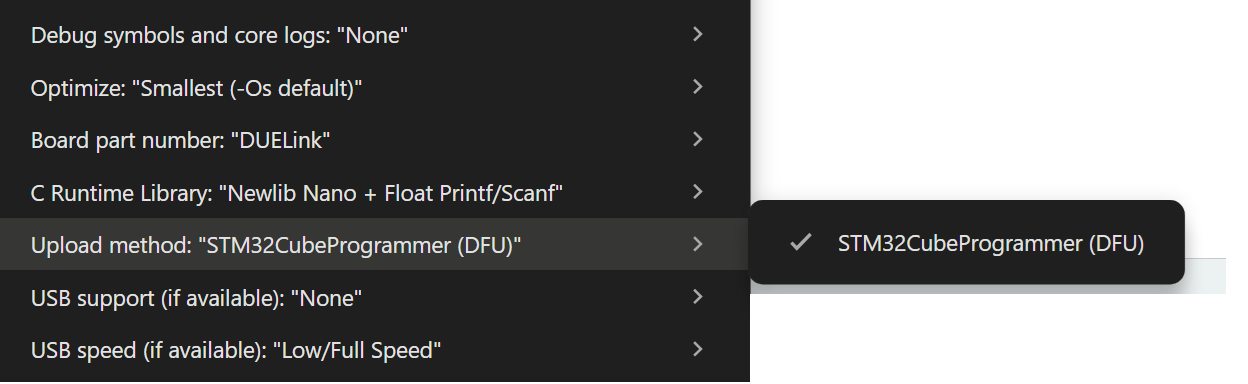
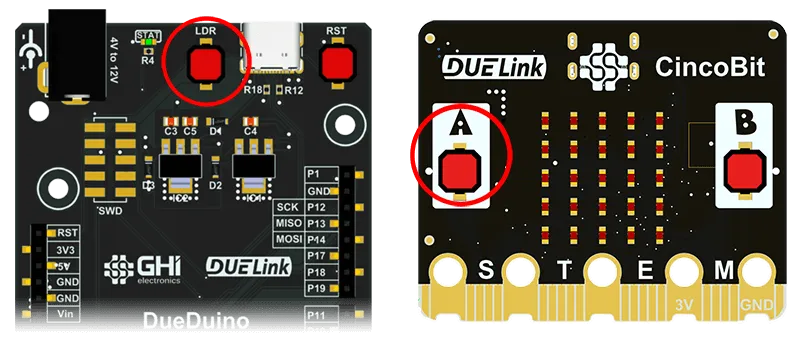
To load the Arduino program onto the DUELink module, put the board in loader mode (DFU) mode. This is done by holding LDR or "A" button down while resetting the board.
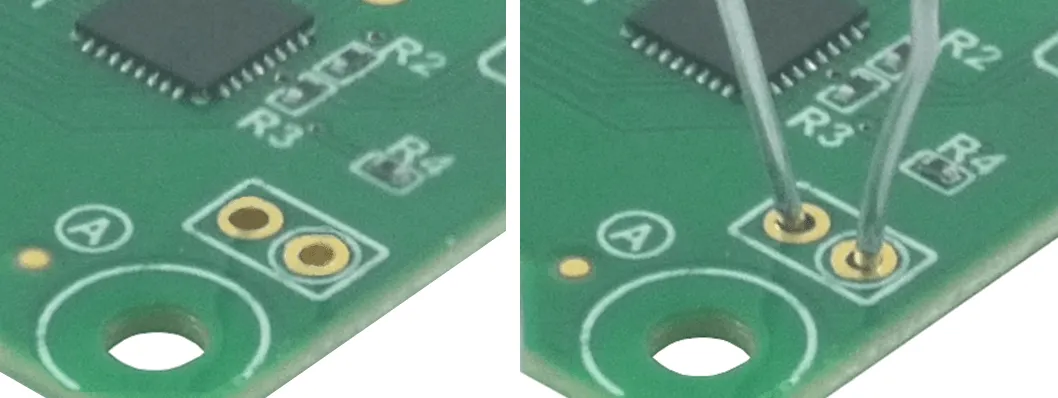
Modules that do not have buttons will include a 2-hole-pad (BOOT0 - 3.3V). Use a paper clip (or a wire) to short the two pads. Reset the board by cycling power then remove the paper clip.
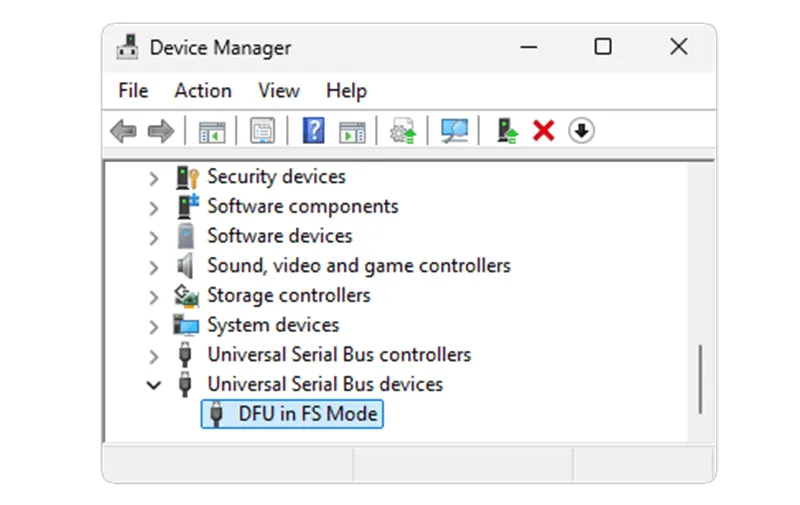
You can verify the board is in DFU mode by checking the device manager.
Once STM32CubeProgrammer is installed, click on the Upload arrow, this will compile the sketch file and upload it to the device.
If you'd like to go back to using DUELink software you'll need to reload the DUELink firmware. Details are found on the Loader page.
Host a chain from your Arduino sketch
A module running your Arduino sketch can itself host a chain of other DUELink modules. The downstream modules keep their default firmware and still accept plain-text commands — your sketch writes those commands out the Downlink port (Serial2) and reads the responses back, using the DUELink Arduino library.

#include <DUELink.h>

SerialTransport transport(Serial2);
DUELink duelink(transport);

void setup() {
  Serial2.begin(115200);
  duelink.Connect();

  duelink.Engine.Select(1);              // first module in chain
  duelink.System.StatLed(200, 200, 10);  // blink 10 times

  duelink.Engine.Select(2);              // second module
  duelink.System.StatLed(200, 200, 0);   // blink forever
}

void loop() {}
Result: your Arduino code commands a chain of DUELink modules exactly the way a PC or Pi would — but the "host" is a tiny STM32 right there in the project. See Chain modules for the wiring side.
In this setup, the Arduino-loaded module is the host and has no DUELink address. The chained modules use the normal addressing (1, 2, 3, …) — and they're invisible to anything upstream of the Arduino-loaded module.
Going further
- Arduino as host — drive DUELink modules from an off-the-shelf Arduino board instead
- C++ — skip the Arduino IDE and target the STM32 directly (CubeIDE, Keil, etc.)
- On-Module Code overview — all the ways to put code on a module