MicroPython

You can use DUELink with any microcontroller that supports MicroPython, include Raspberry Pi RP2040 and RP2350.
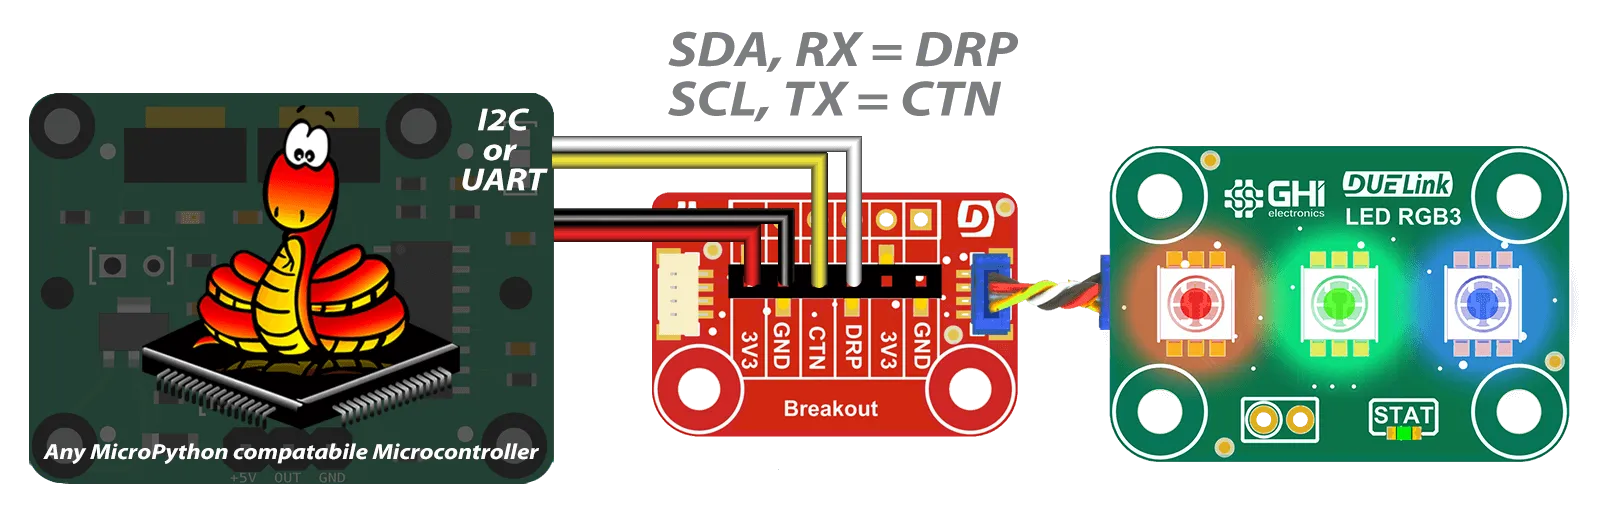
Boards that have JST connector can plug in directly. However, you can use the Breakout module to connect any board, using I2C or UART.
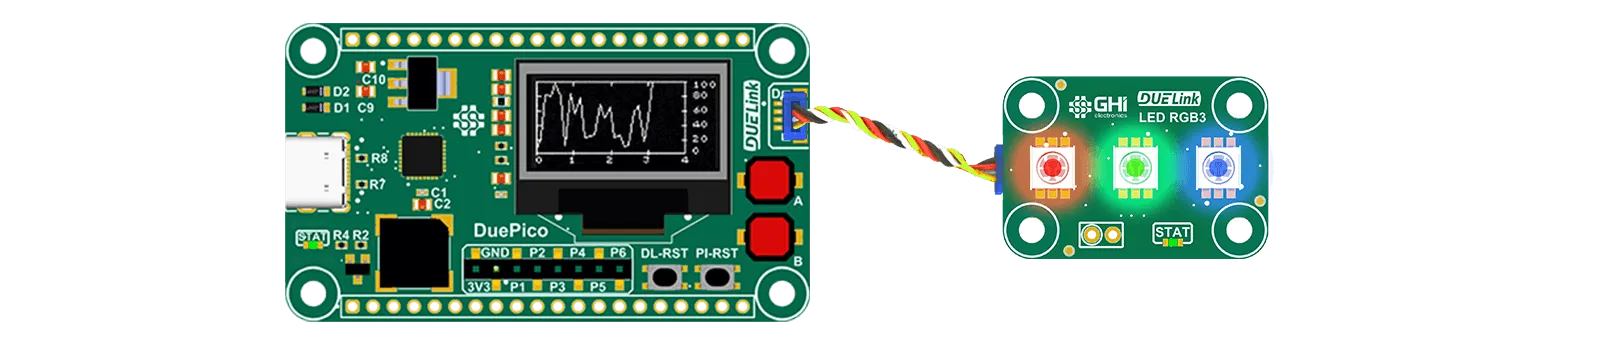
We also offer DuePico, the perfect Raspberry Pi Pico adapter!
As for IDE options, you can use whatever you prefer. In the following examples, we'll use Thonny IDE to program the RaspberryPi that is plugged into a DuePico.
Note that MicroPython will be executed on a compatible supported hardware option, which is tethered to DUELink modules. MicroPython does not run on the module itself! The Standalone page shows some options that run on modules directly.
Getting Started
The DuePico used in this example is a smart adaptor, where it is a functional module itself. Plug it directly to a PC using a USB cable then visit loader.duelink.com to make sure it has the latest DUELink Official firmware and related module drivers.
First make sure your RaspberryPi Pico board is set up for MicroPython. Follow the steps found at MicroPython.org to load the firmware for your specific hardware.
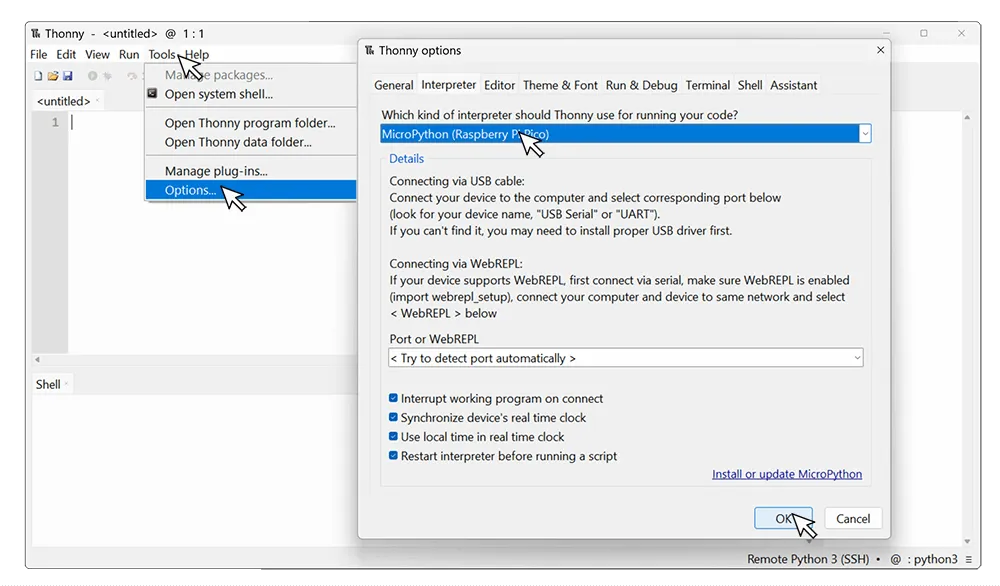
Connect to the board by going to Tools/Options and select the proper Interpreter. In this case we'll be selecting MicroPython(Raspberry Pi Pico).
We can test that everything is working correctly by blinking the Raspberry Pi Pico's onboard LED.
import machine
import time

led = machine.Pin(25, machine.Pin.OUT)

while True:
    led.on()
    time.sleep(1)
    led.off()
    time.sleep(1)
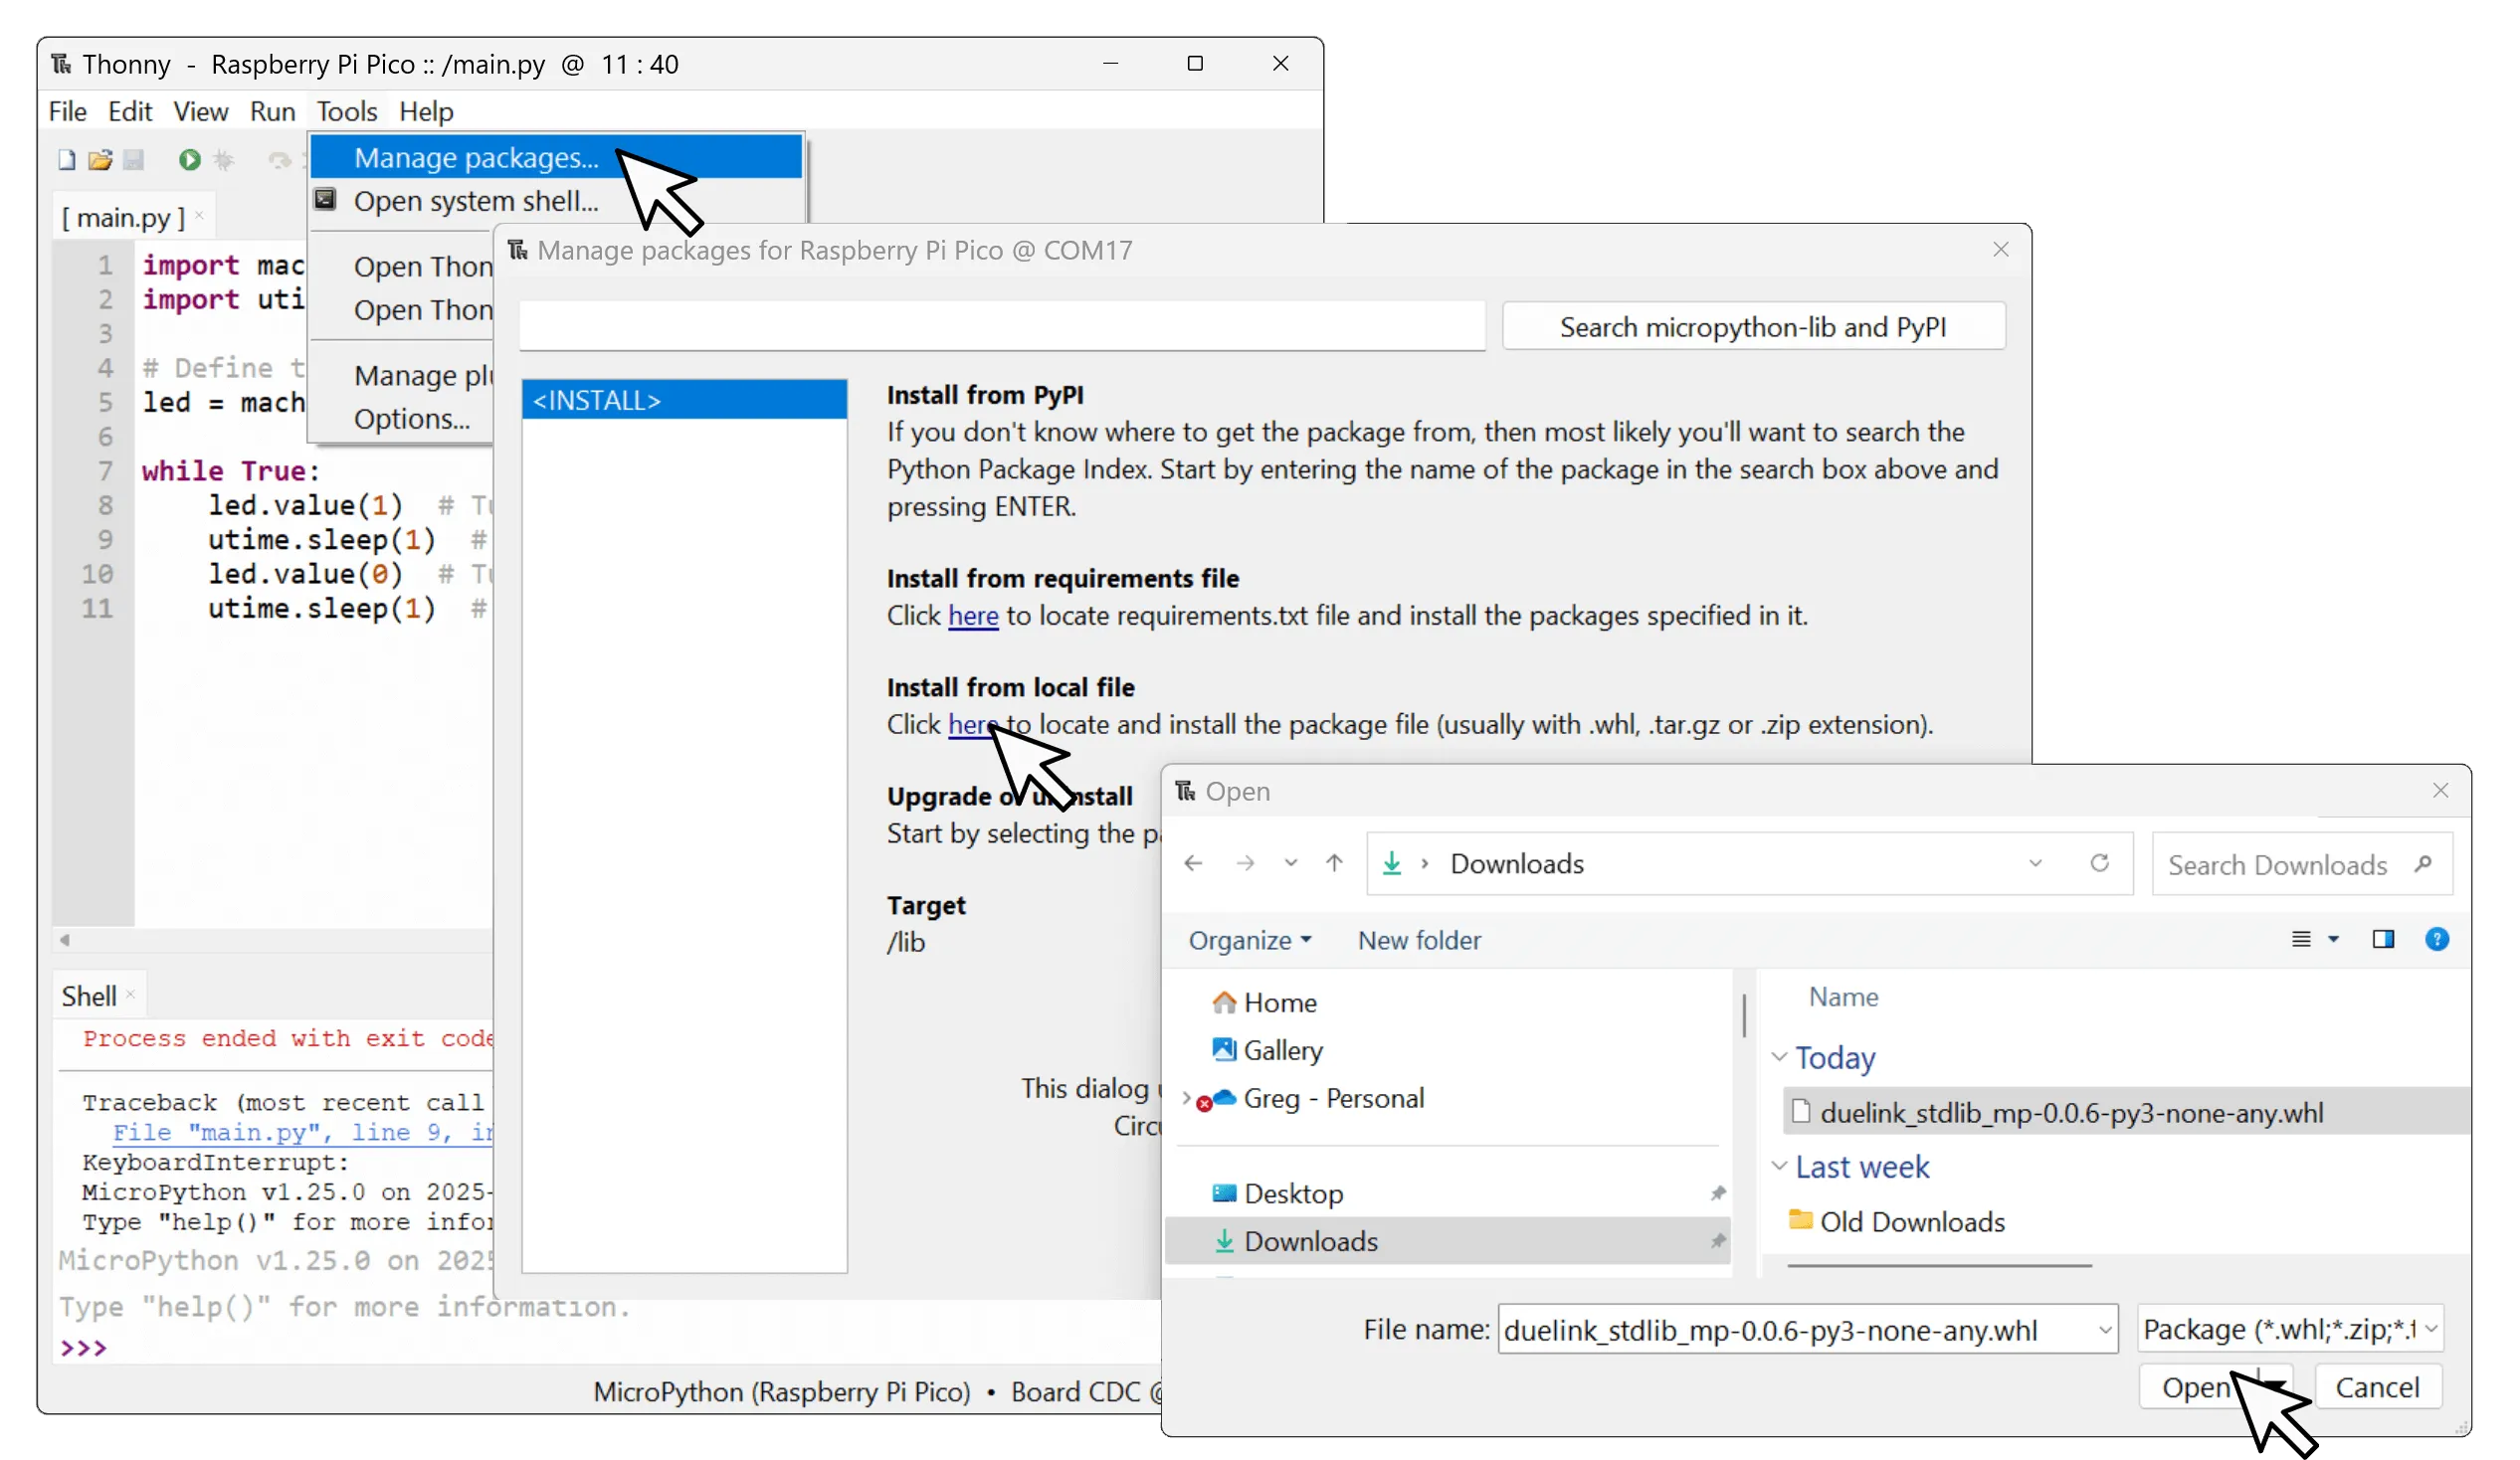
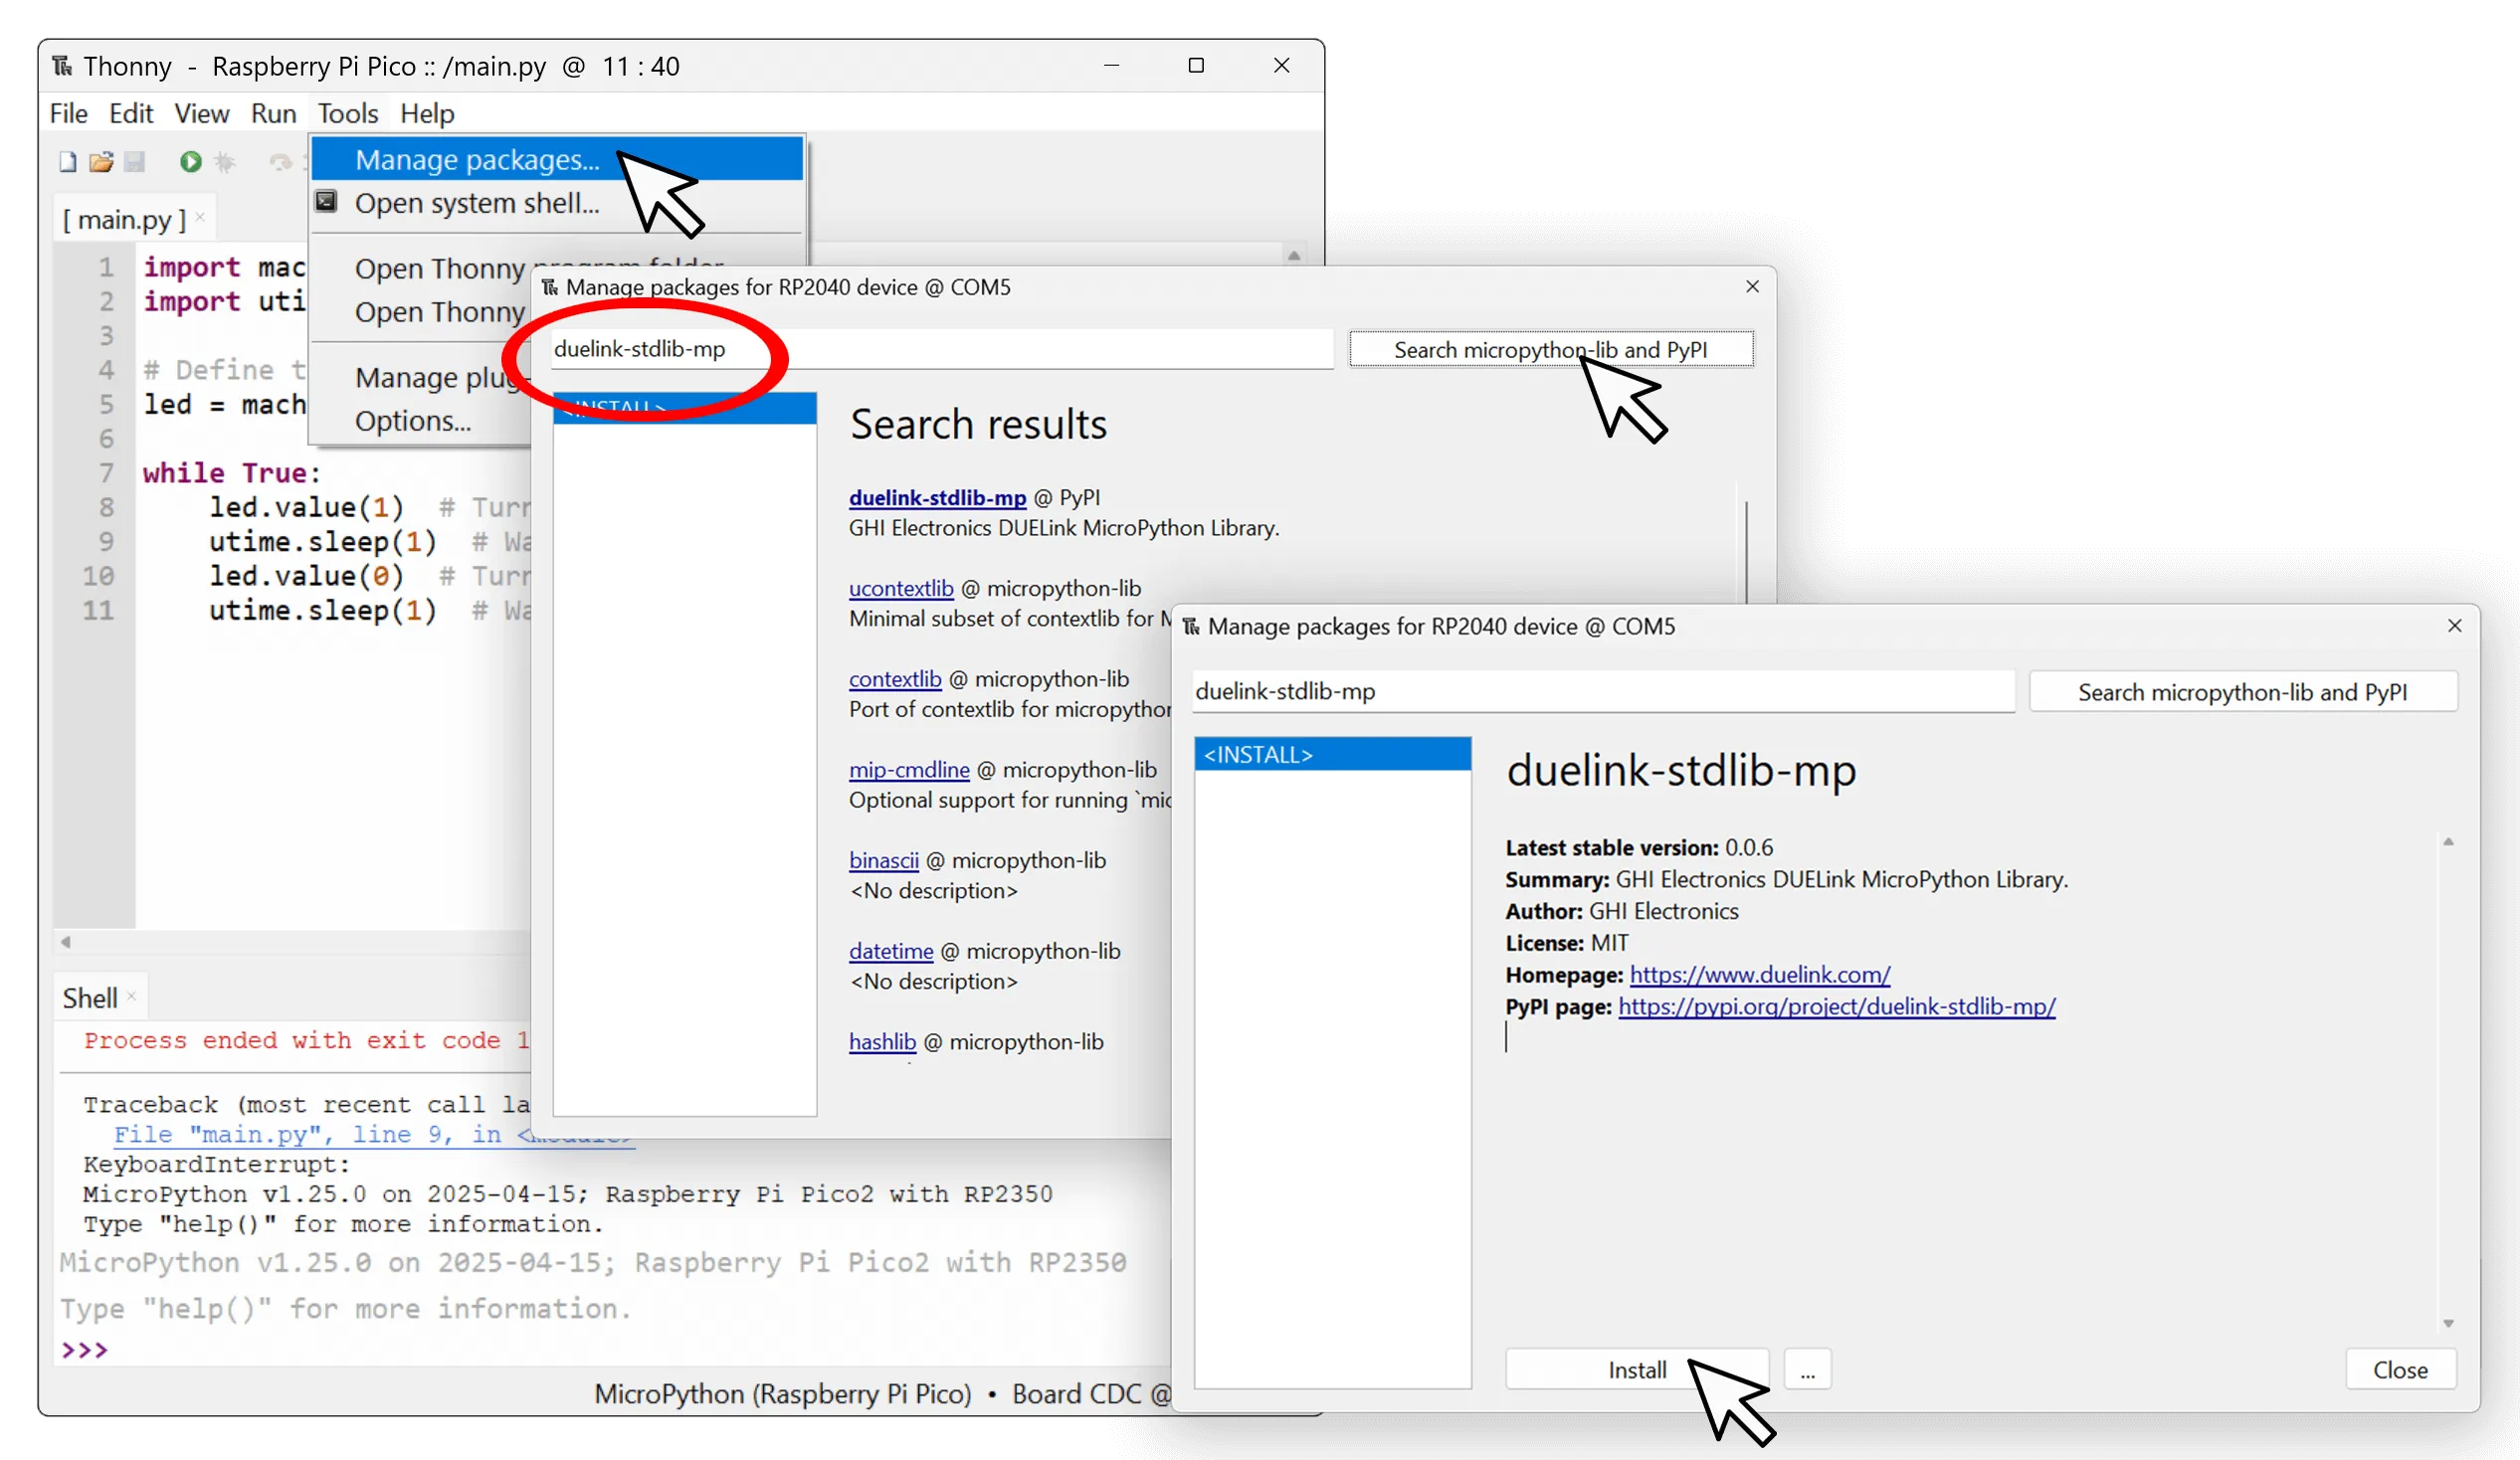
We now need to load the DUELink libraries, either download the duelink-stdlib-mp file found at pypi.org to your computer and Install from local file found under Tools/Manage packages.
Alternatively, users can type duelink-stdlib-mp into the search window and Install from PyPi directly.
Our first program will blink the on-board status LED on a tethered module, on for 200ms then it shuts off for 800ms, and does this 20 times.
DuePi uses UART Interface to communicate with Raspberry Pi Pico.
import time
import machine
import duelink

from duelink import transport

uart = transport.UartTransportController(0)
due = duelink.DUELinkController(uart)

due.System.StatLed(50,50,0)
You can also use boards that already have a JST connector, like Adafruit QT Py RP2040 or Sparkfun Pro Micro RP2350.
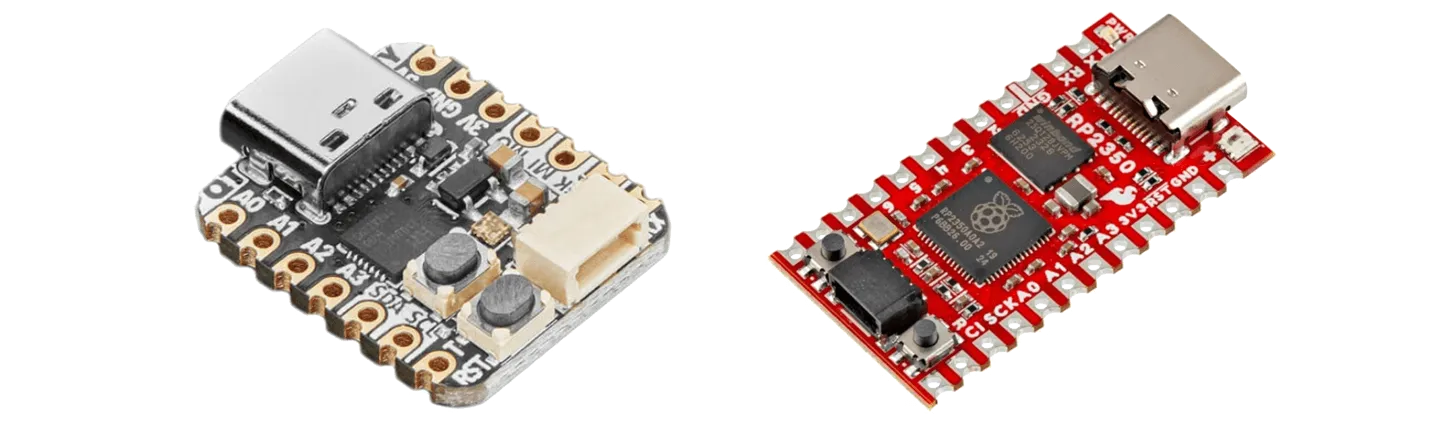
However, note that these boards use the I2C Interface.
import time
import machine
import duelink

from duelink import transport
from machine import Pin, Timer

sclPIN = machine.Pin(23)
sdaPIN = machine.Pin(22)

i2c = transport.I2CTransportController(sda=sdaPIN, scl=sclPIN)
due = duelink.DUELinkController(i2c)

due.System.StatLed(50,50,0)
Some third-party boards are not equipped with the proper I2C pull up resistors. The DUELink PullUp board can be used to solve this problem. See I2C Interface page for more details.

Daisylinking
DUELink modules can be Daisylinked together. The duelink.Engine.Select() function is used to select the module to be listening to incoming commands.
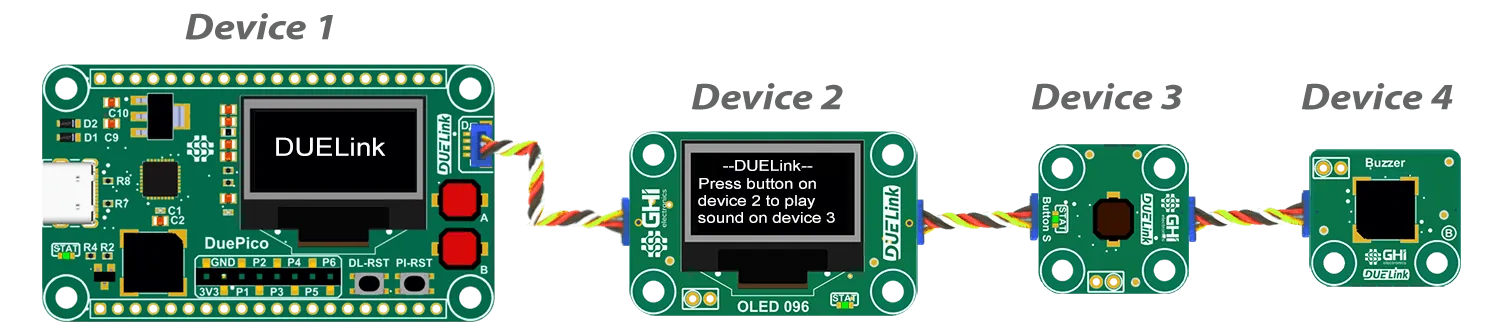
In the example below, we'll use Python to control an OLED Display, a Button, and a Buzzer.
Visit loader.duelink.com to "discover" modules and load the latest firmware and drivers.
Note how the DuePico itself is a module, which is Device 1.
import time
import duelink  # standard lib

from duelink import transport

# device 1 is DuePico
# device 2 is OLED 96
# device 3 is Button S
# device 4 is Buzzer

uart = transport.UartTransportController(0)
due = duelink.DUELinkController(uart)

due.Engine.Select(1)#DuePico Display
due.Graphics.Clear(0)
due.Graphics.TextS("DUELink", 1, 30, 27,2,2)
due.Graphics.Show()

due.Engine.Select(2)#OLED 96 Module
due.Graphics.Clear(0)
due.Graphics.Text("--DUELink--", 1, 30, 1)
due.Graphics.Text("Press button on", 1, 1, 21)
due.Graphics.Text("device 2 to play", 1, 1, 31)
due.Graphics.Text("sound on device 3", 1, 1, 41)
due.Graphics.Show()

due.Engine.Select(3)#Button Module
due.Button.Enable(1,0)
due.Engine.Select(1)#DuePico `A` Button
due.Button.Enable(20,1)

while True:
    due.Engine.Select(3)#Button Module
    if due.Button.Down(1):
        due.Engine.Select(4)
        due.Frequency.Write(7, 1000, 100, 0.5)

    time.sleep(0.1)

    due.Engine.Select(1)#DuePico Module
    if due.Button.Down(20):
        due.Frequency.Write(11, 1000, 100, 0.5)

    time.sleep(0.1)
Code Samples
Individual product pages include specific code samples that utilize the module's Driver Script.
See Tethered Samples under individual module pages.