Getting Started

DUELink is here to help you no matter if you are an engineer building a commercial product, a maker doing-it-yourself, or an educator molding a learner's future.
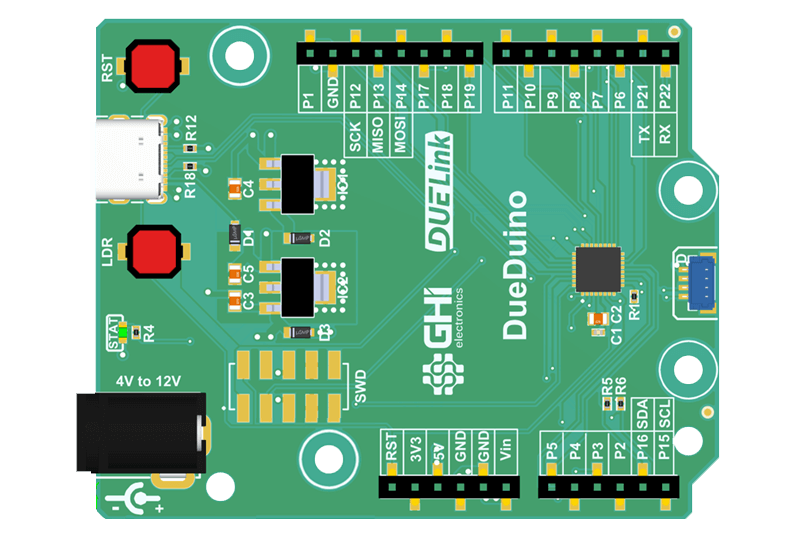
There are many ways to use DUELink, with its long list of supported languages and hardware options. This page will focus on the bare minimum to get you started with one of the available DUELink microcomputers, such as the ultra-low-cost CincoBit and its cousin PixoBit.

The Arduino-friendly DueDuino is another example.
Online Demo
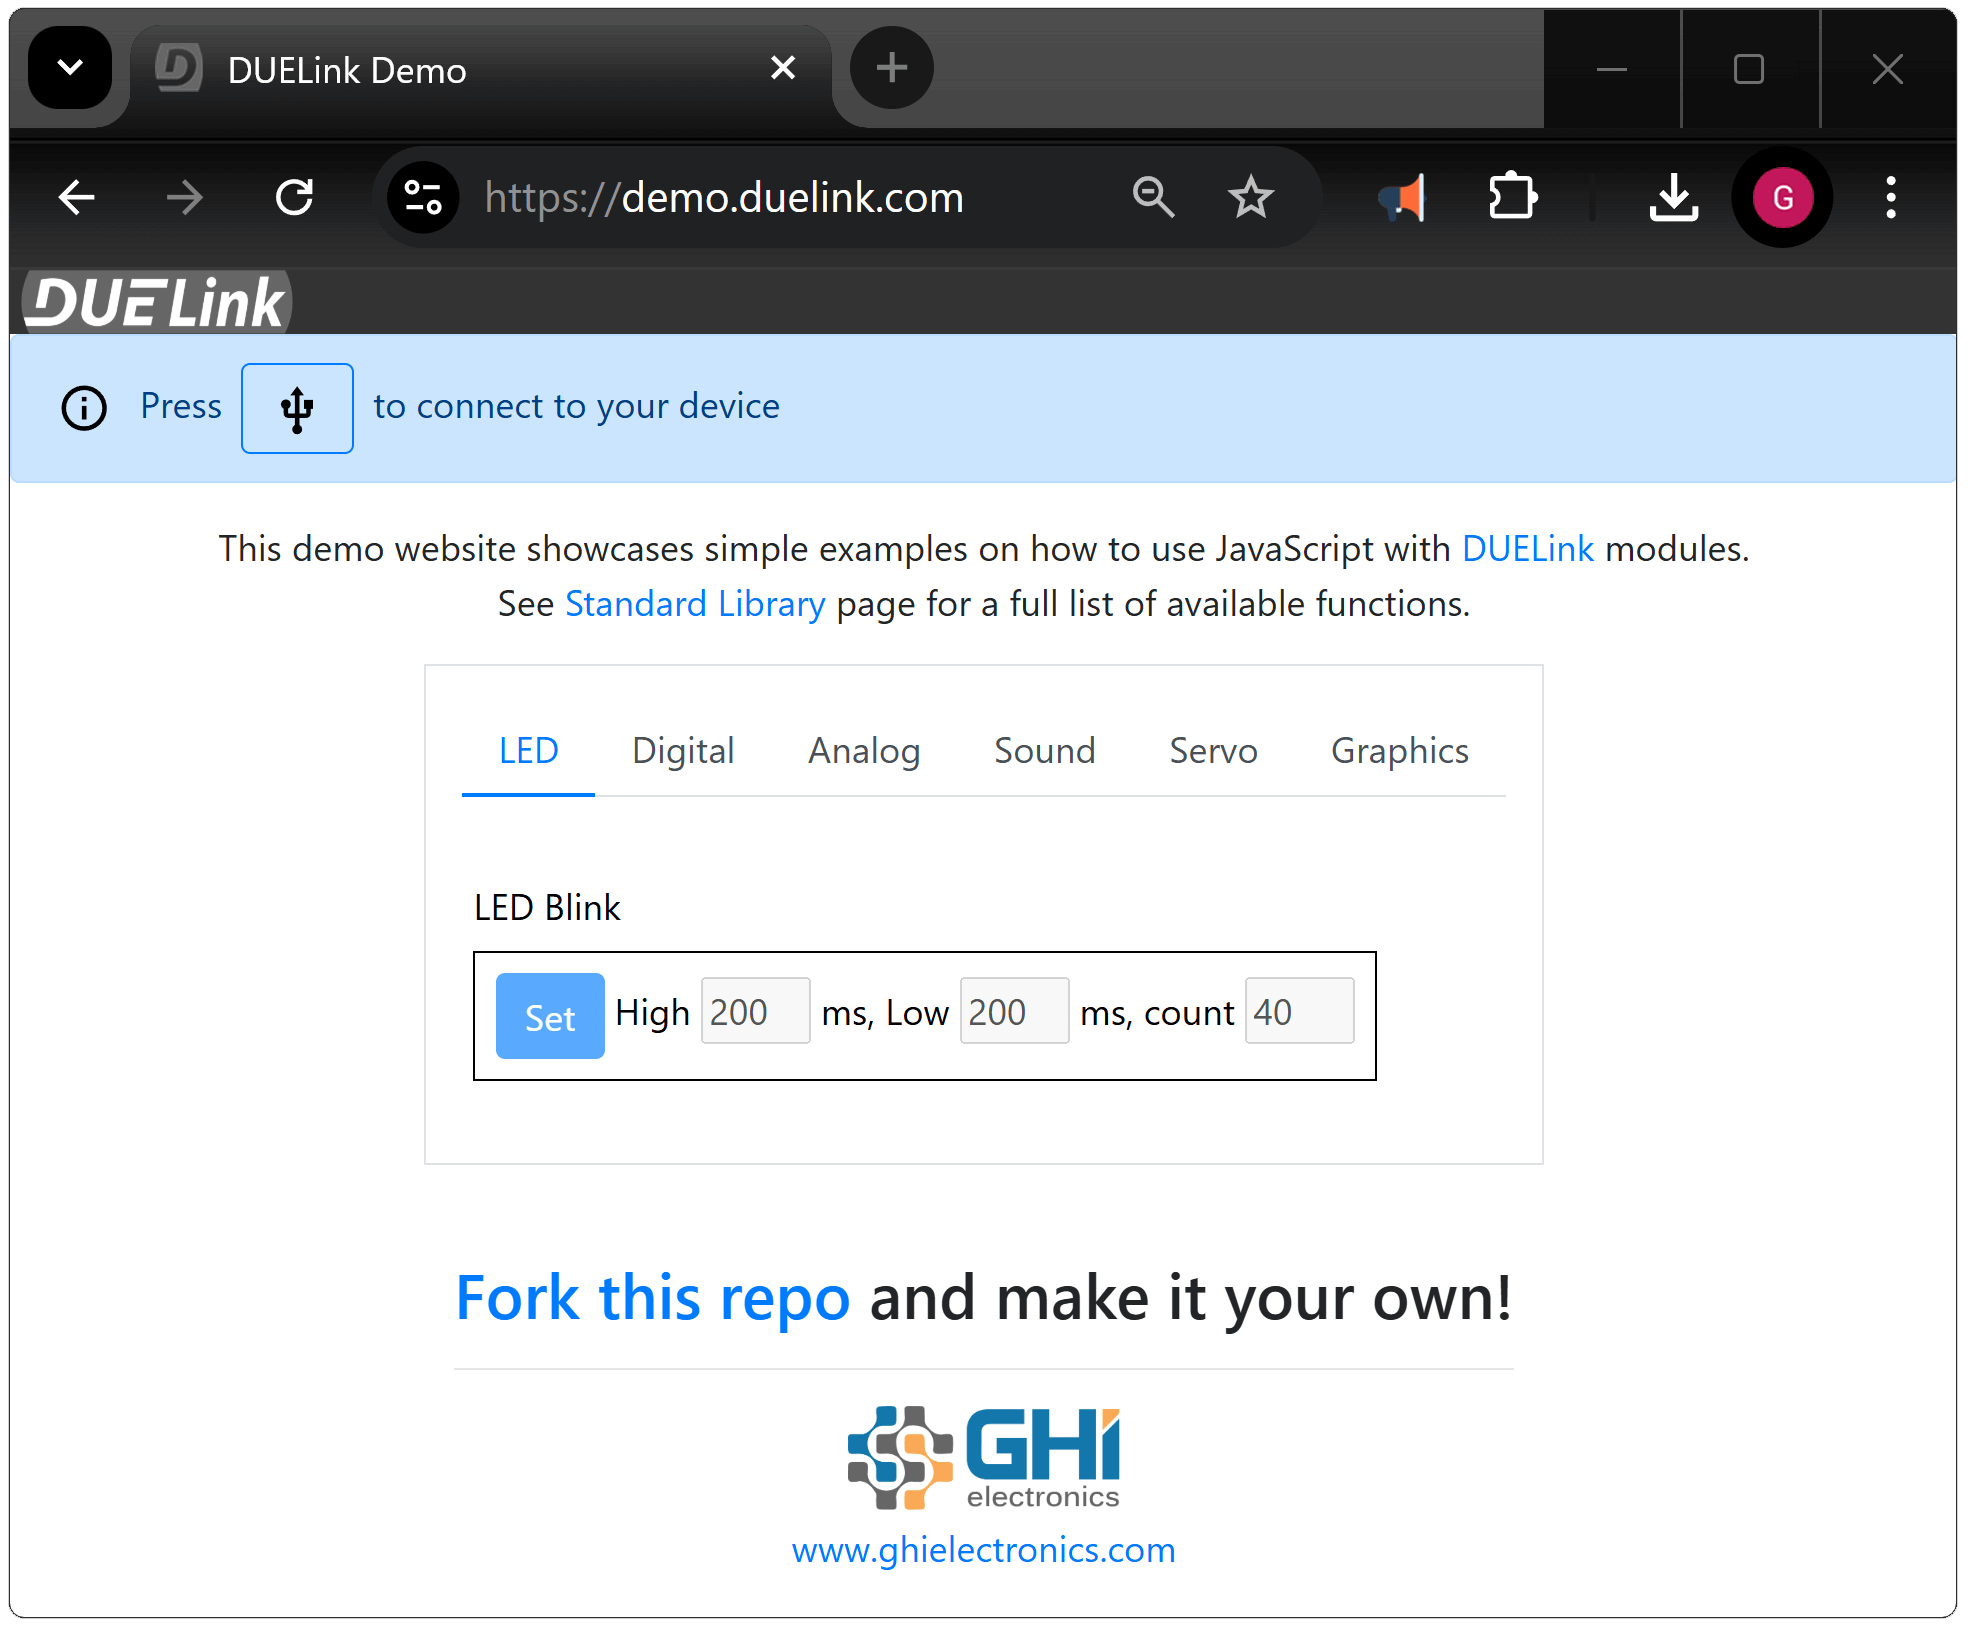
The fastest way to try DUELink is though this Online Demo, which uses JavaScript through a web browser to run some of the DUELink Standard Library commands.
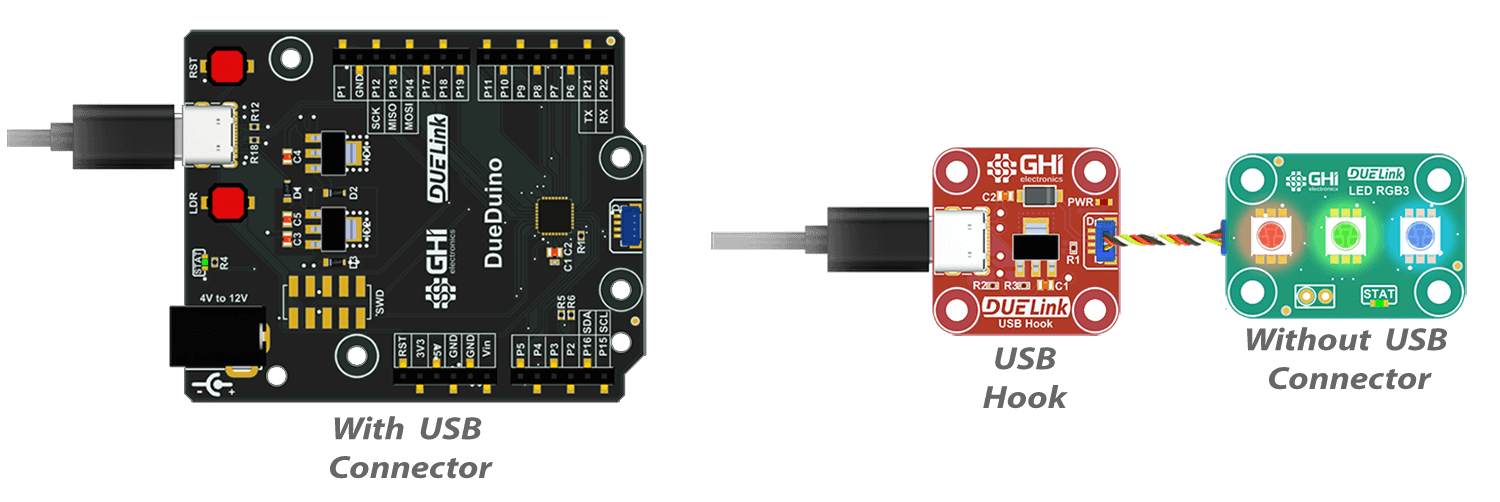
While all DUELink modules support the USB Interface, some boards have a USB connector built in. Other boards have a standard Uplink connector and require a USB adaptor such as USB Hook.
Here is a DueDuino example, which has a USB connector built-in, vs an LED module that is connected to USB through a USB Hook.
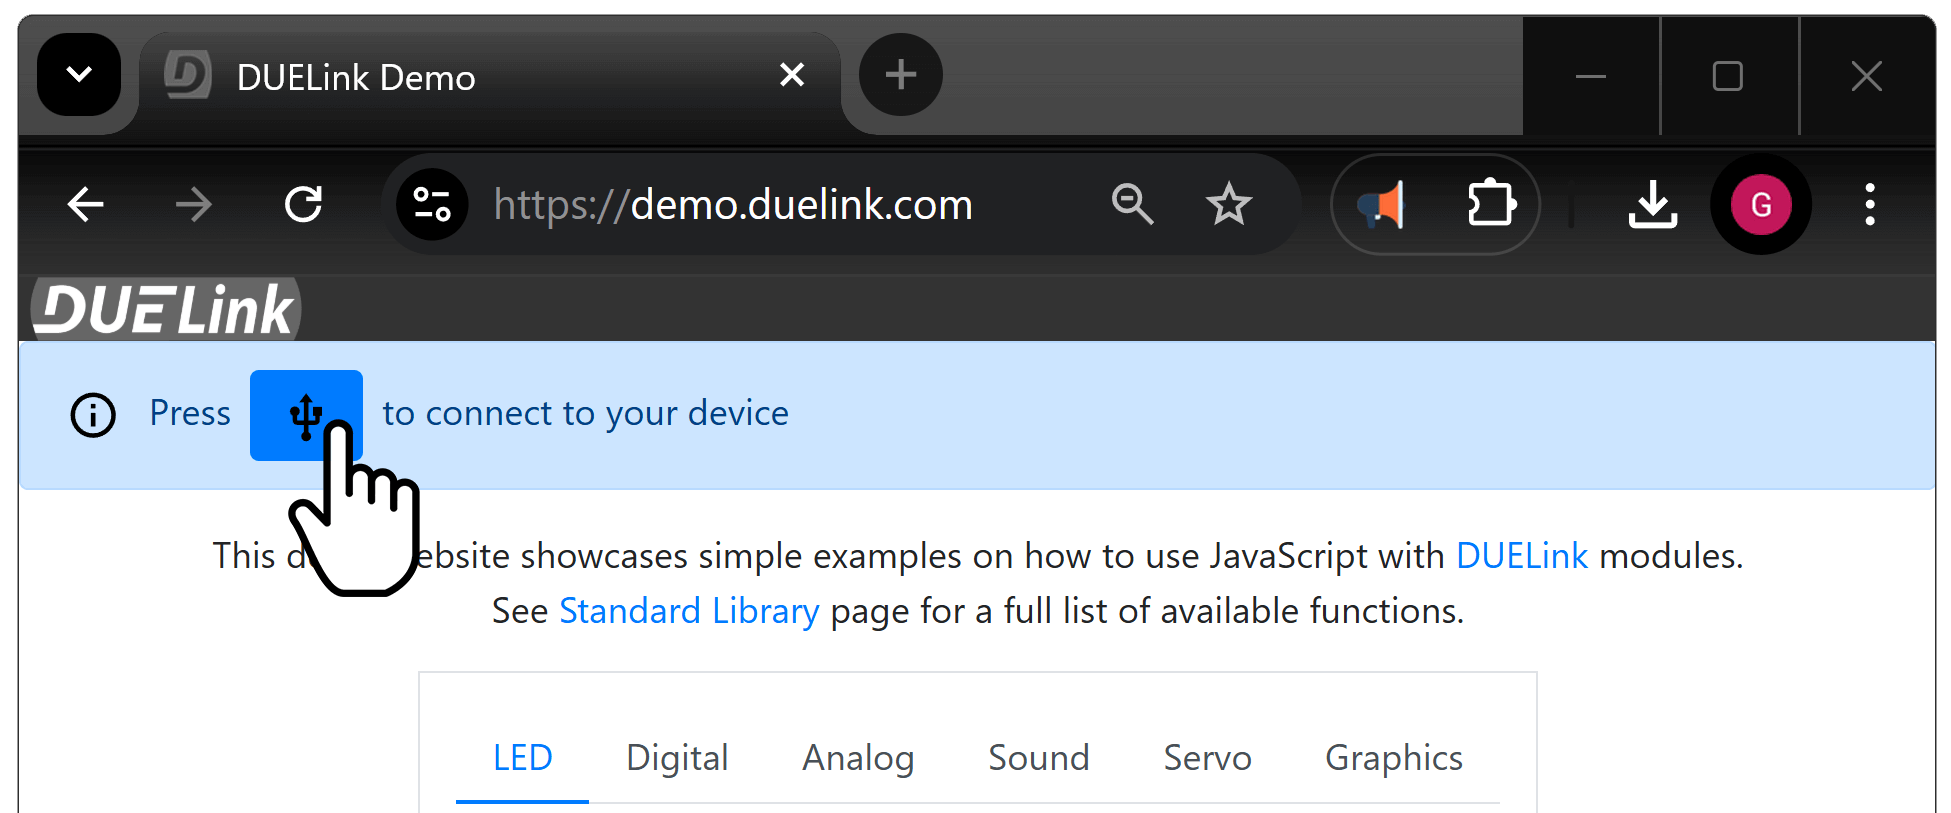
Start by plugging in your device to a USB port, open the demo site and connect the device.
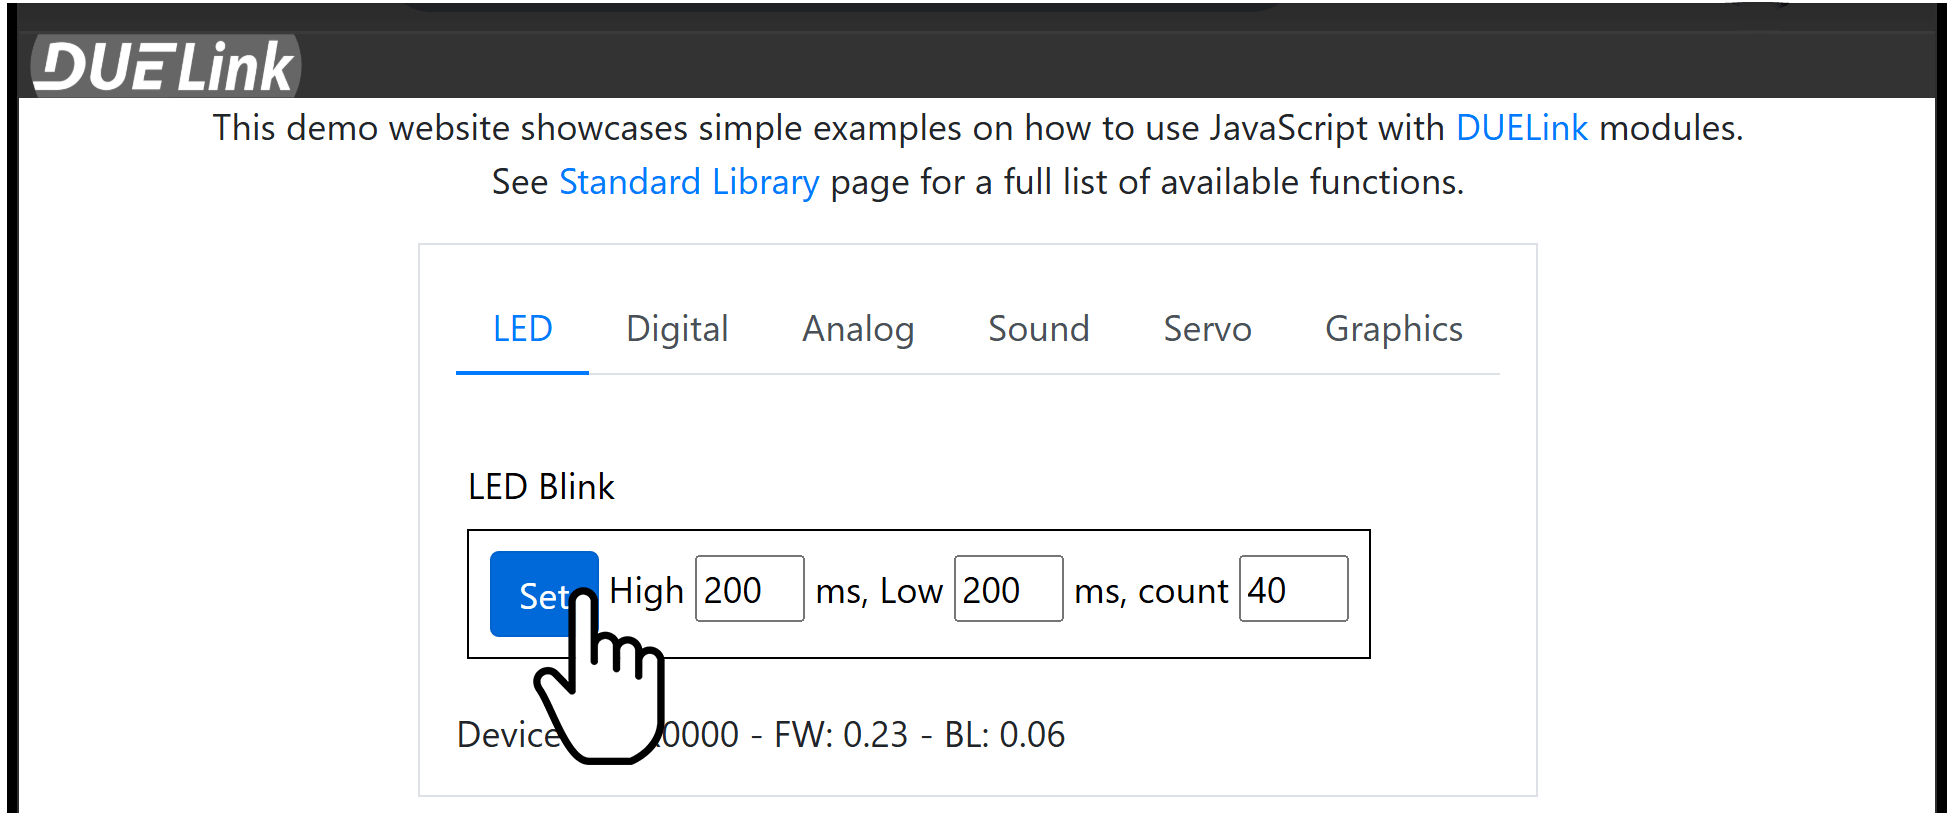
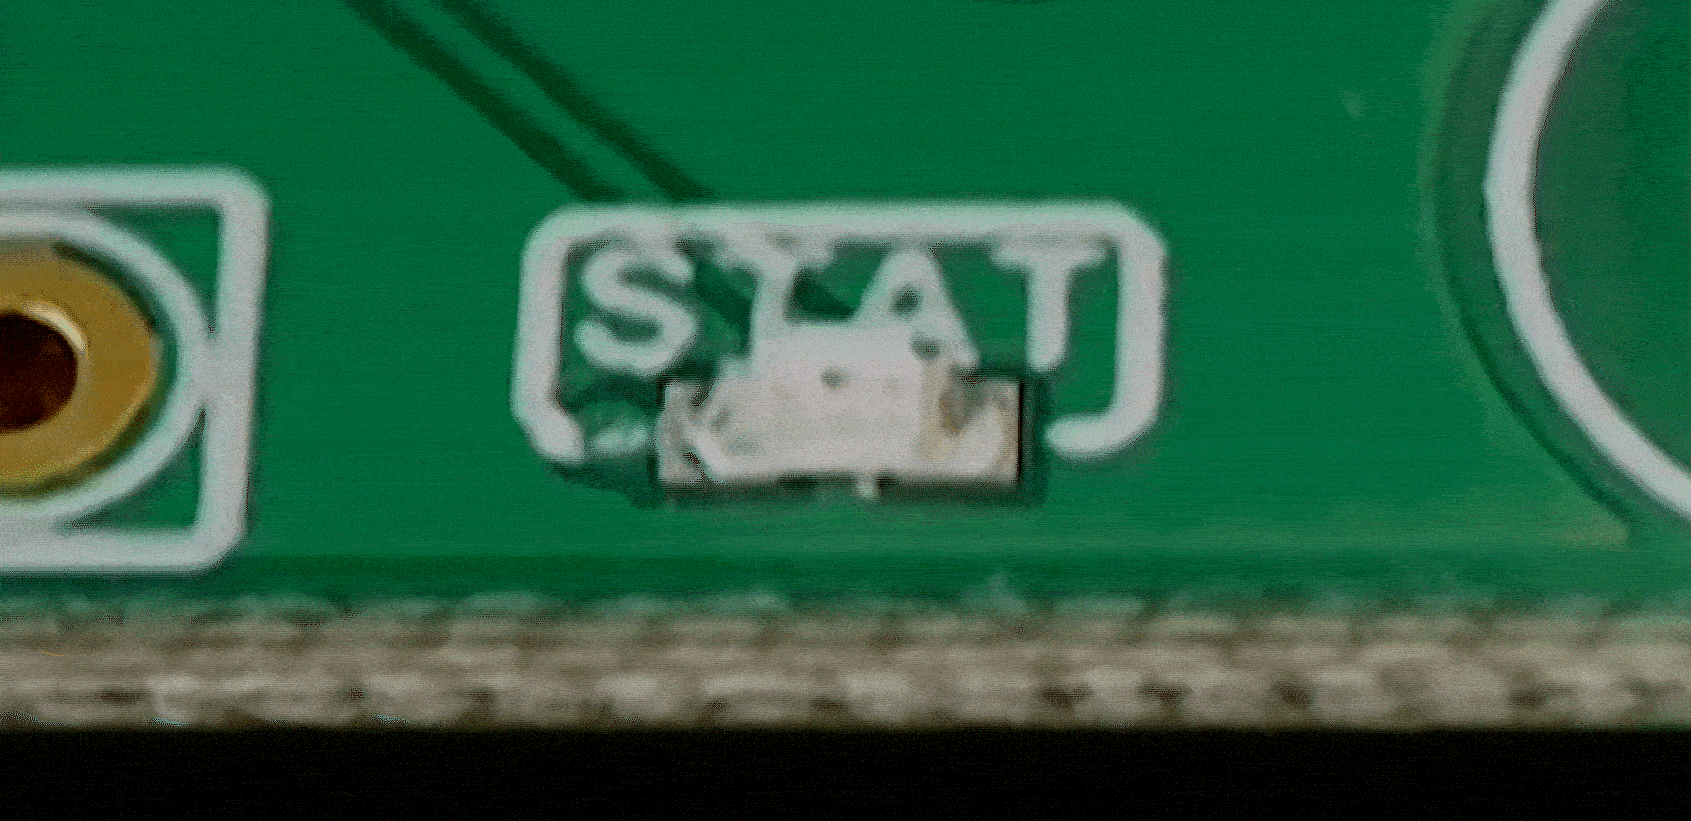
The first tab is for controlling the STAT LED. This is an LED that is found on all DUELink modules. Change the parameters and observe the STAT LED on the board.
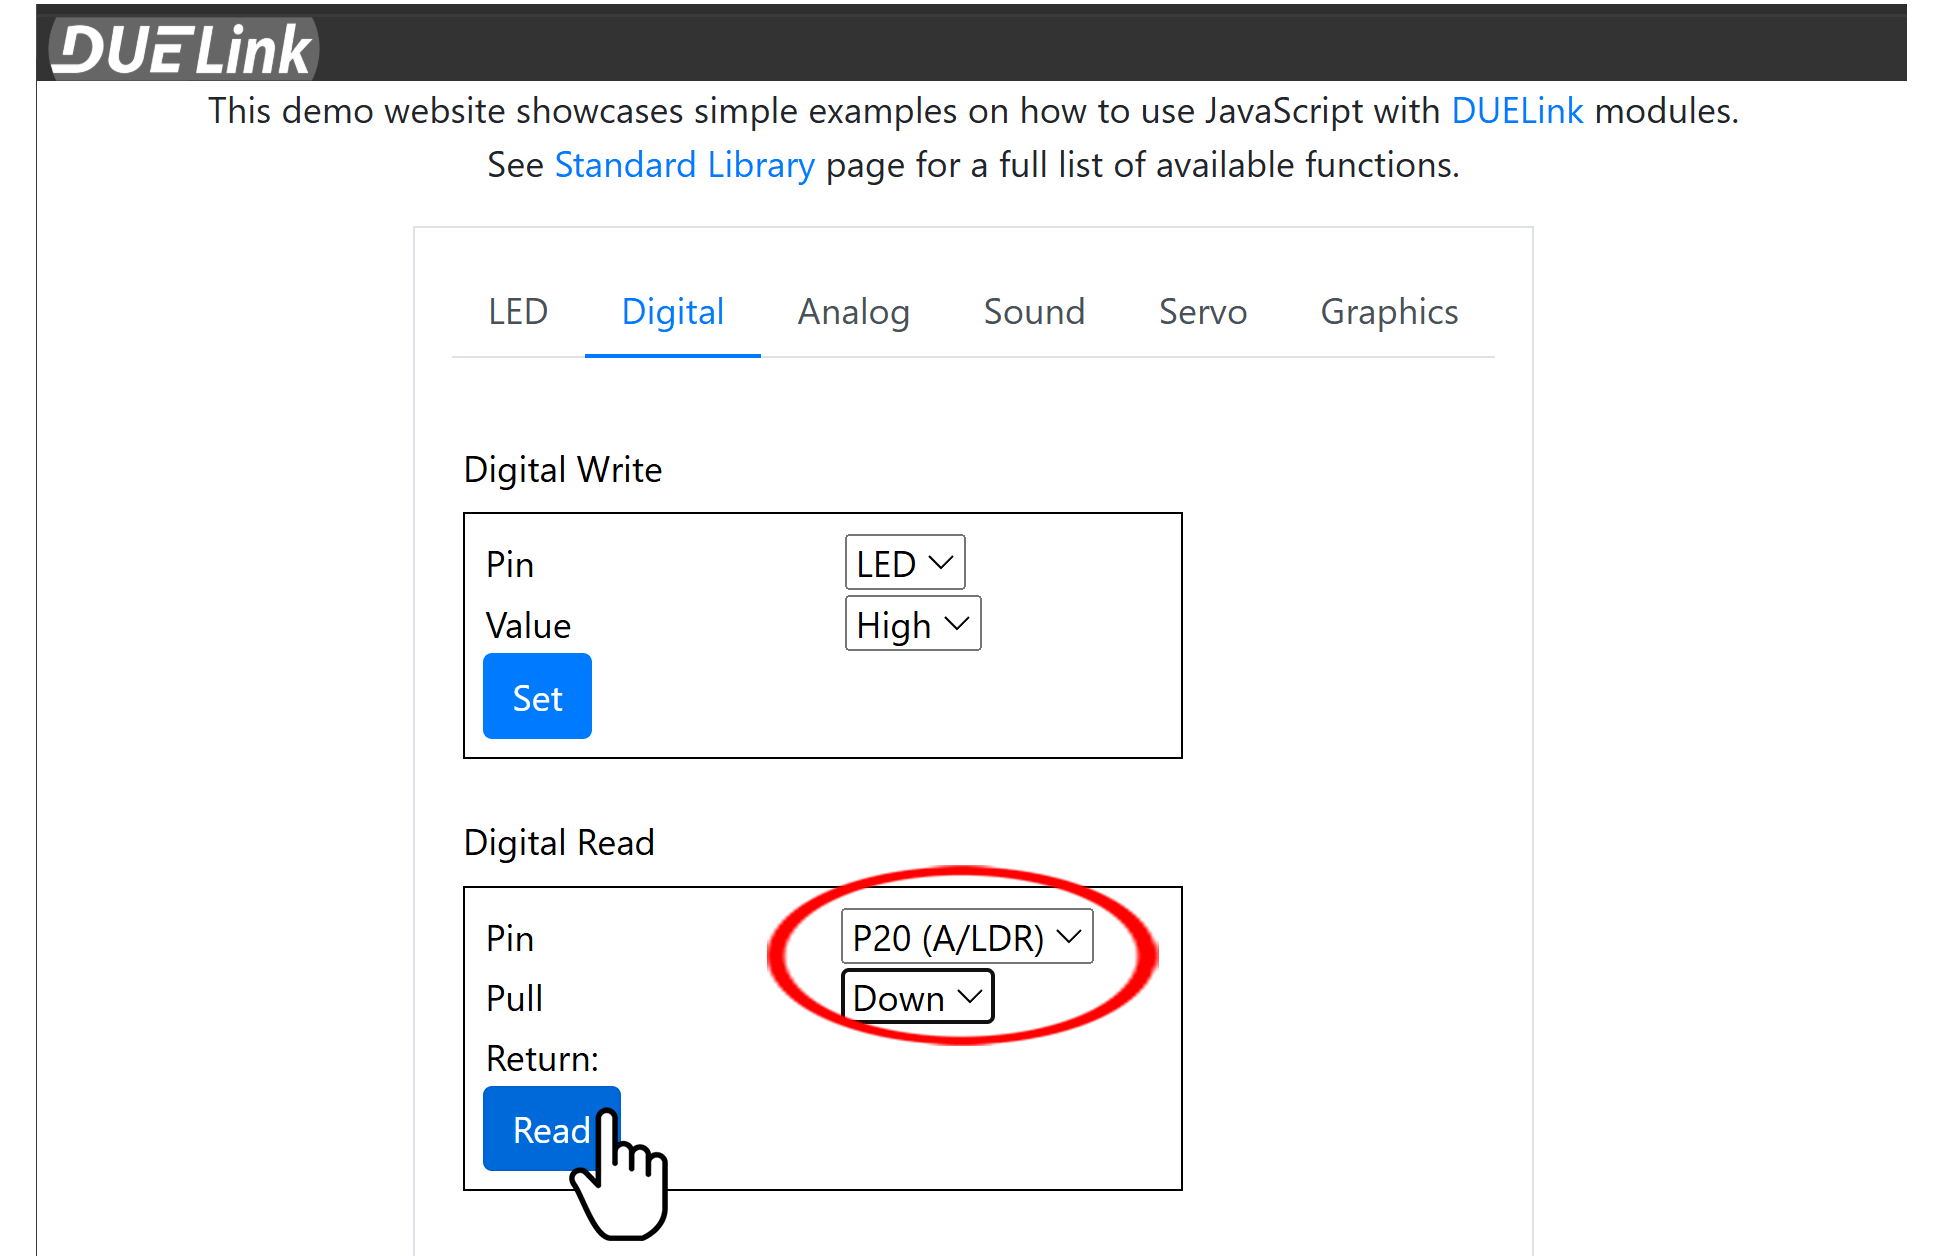
If you are using a board with A or LDR buttons, you can also try Digital read on these buttons. These buttons are connected to pin 20. You will need to set Pull to Up. You can now hold the button up or down while clicking Read.
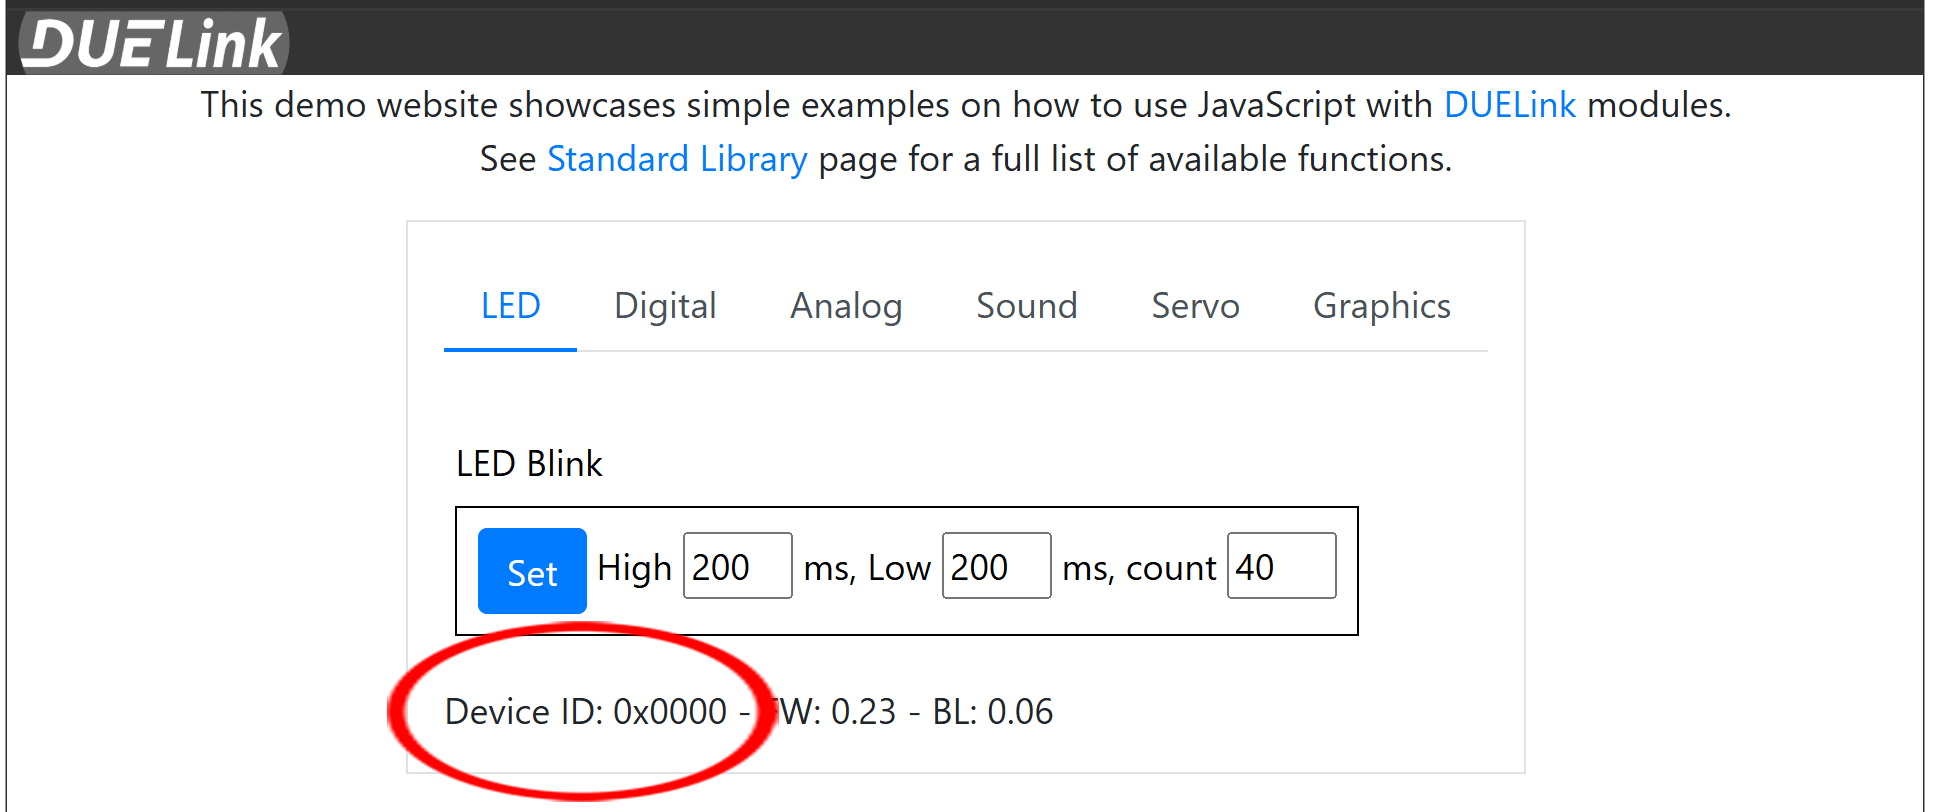
By the way, when connected, the demo site shows the device ID and its firmware version.
Firmware Update
The DUELink Console is a useful online platform to handle many important tasks, such as firmware update and scripting. It is fully covered in details here.
When you receive and new module, it is important that your board is using latest firmware. We will use the Console to check the firmware version, and update if necessary.
Plug in your device and "connect" it.
The console will show the current version loaded on the module and also the latest available version.
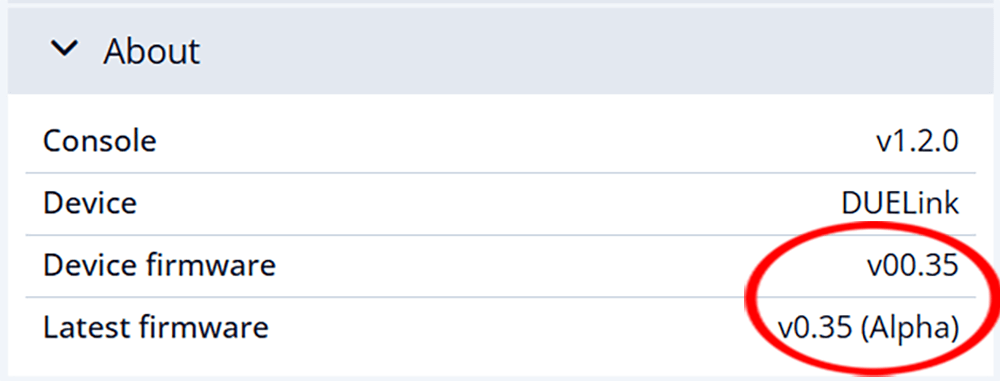
The Release Notes lists the changes.
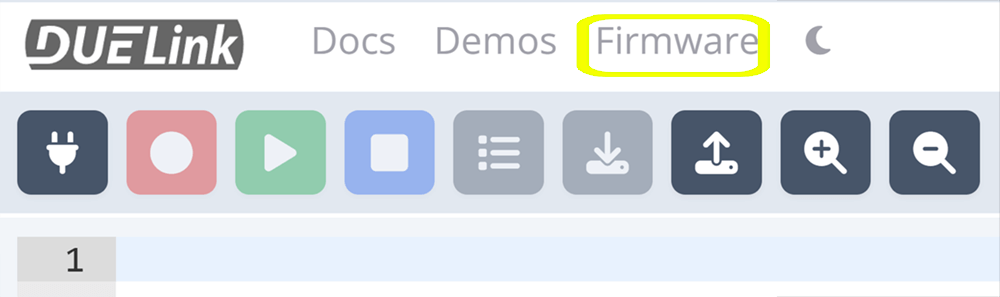
To update the firmware, open DUELink console https://console.duelink.com/ and click Firmware.
Follow the instructions and load the latest firmware. Full details are found on the loader page.
Demo Scripts
The console includes a few simple scripts. Give some a try for an easy start with zero setup! These examples utilize the Internal Engine's built-in scripting language.
An example script would be a single line that controls the status LED (STAT LED). This LED is found on every single DUELink module.
# Blinks Status LED High for 200ms, Low for 200ms, repeat 50 times
StatLed(200,200,50)
Record and run your script then observe the LED. Try changing the numbers to change the LED behavior.
See the Console page for full details.
Hello World
Now, you are ready to use one of the languages, such as Python or JavaScript. These are just some of the available Coding Language options. There are standalone options as well. These pages include full instructions on how to load programs but here is a small example that shows what a full program looks like. It uses the StatLed().
- Python
- Javascript
- .NET C#
You need ot install the DUELink Python library using pip install DUELink, see Python page for details.
from DUELink.DUELinkController import DUELinkController
import time

# Connect
availablePort = DUELinkController.GetConnectionPort()
duelink = DUELinkController(availablePort)

# Blink
duelink.System.StatLed(200,200,50)
You need ot install the DUELink JavaScript library using npm install DUELink & npm install serialport, see JavaScript page for details.
const { SerialUSB } = require("dlserialusb");
const { DUELinkController } = require("duelink");
const { Util } = require("duelink");

// Connect
let duelink = new DUELinkController(new SerialUSB());
await duelink.Connect();

// Blink
await duelink.System.StatLed(200, 200, 50);
You need ot install the DUELink Nuget GHIElectronics.DUELink, see .NET page for details.
using GHIElectronics.DUELink

// Connect
var availablePort = DUELinkController.GetConnectionPort();
var duelink = new DUELinkController(availablePort);

// Blink
duelink.System.StatLed(200, 200, 50);
This is another example that controls the STAT LED directly using digital write. Note that the STAT LED is always pin 0. This program runs an infinite loop. Stopping the program will stop the LED from blinking.
- Python
- Javascript
- .NET C#
from DUELink.DUELinkController import DUELinkController
import time

availablePort = DUELinkController.GetConnectionPort()
duelink = DUELinkController(availablePort)

while True:
  duelink.Digital.Write(0, 1)
  time.sleep(0.5)
  duelink.Digital.Write(0, 0)
  time.sleep(0.5)
import {SerialUSB} from './serialusb.js';
import * as DUELink from './duelink.js';
import { Util } from "./util.js";

let duelink = new DUELink.DUELinkController(new SerialUSB());
await duelink.Connect();

while (true){
    await duelink.Digital.Write(0, 1)
    await Util.sleep(500)
    await duelink.Digital.Write(0, 0)
    await Util.sleep(500)
}
var availablePort = DUELinkController.GetConnectionPort();
var duelink = new DUELinkController(availablePort);

while (true) {
    duelink.Digital.Write(0, 1);
    Thread.Sleep(500);
    duelink.Digital.Write(0, 0);
    Thread.Sleep(500);
}