Essentials Kit Tutorial

The Essentials Kit includes modules that cover a wide range of needs. These modules can be used with any supported hardware but we will focus on using them from a PC or Arduino.
When used with a PC, we will focus on Python, but any other coding language can be used.
PC & Python
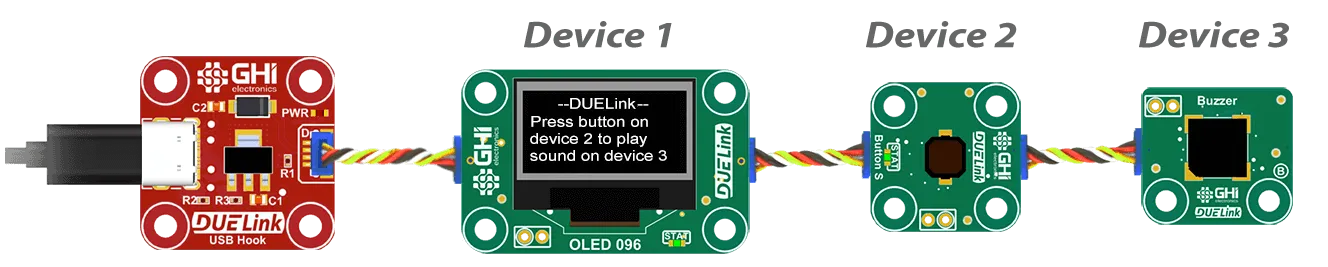
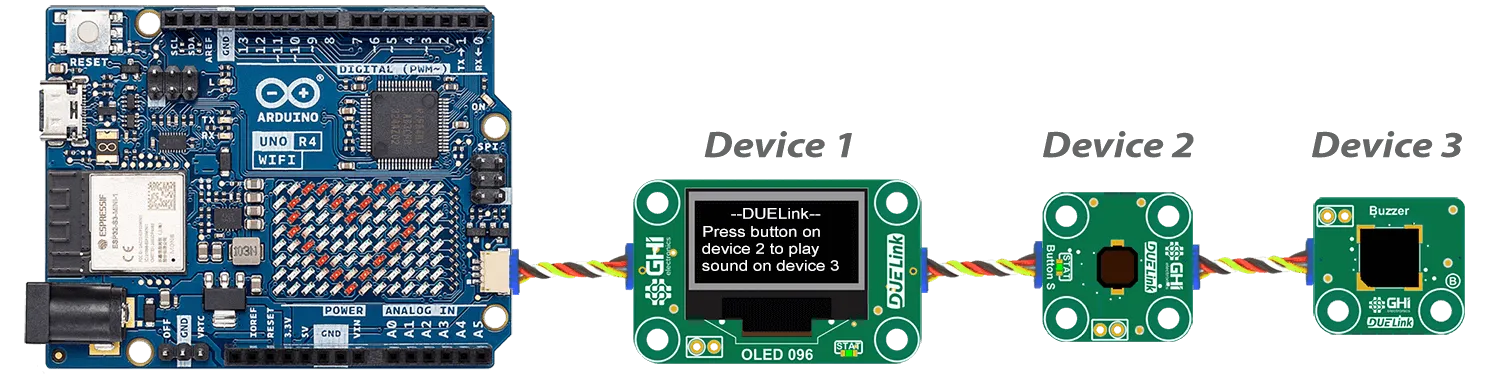
Modules on DUELink can be connected in any order, but we recommend you start with modules wired same as the main image above. This way, any sample code will work as is.
The first step is to go to the loader page and run the discovery service. This will show what modules are connected and what firmware they are loaded with. You can also use the loader to reload all modules with the latest firmware.
You can now visit the Getting Started page to see how to blink STAT LED using Python. This will blink the STAT LED on the first LED in a Daisylink.
Controlling other modules is as simple, you just need to select which module you are talking to.
# Blink the Status LED fast on device 1, 10 times
duelink.Engine.Select(1)
duelink.System.StatLed(200,200,10)

# Blink the Status LED slow on device 2, 50 times
duelink.Engine.Select(2)
duelink.System.StatLed(400,400,50)
Statled() is a standard library function, meaning this is a standard function that is found on all modules. Also, each module has a Driver script that simplifies tasks. For example, when using an accelerometer, the driver may provide AccelX() function that provides that functionality. This eliminates the need for the user to know about the accelerometer's internals.
Each module's page includes a tab for the Driver API. For examples, there is Light() driver function that returns the ambient light level.
That function can then be wrapped in Python.
def GetLight():
    SelectDevice(LIGHT_ADDRESS)
    ret = duelink.Engine.ExecuteCommand("Light()")
    return int(ret)

light = GetLight()
Note how we have added SelectDevice() at the very beginning. This is optional when using one device, but needed when using multiple modules and the system needs to know what module will be selected for the next command.
The PC Tethered Python Sample tab on Essentials Kit Product page has a full example to get you started. Here it is to help you out:
PC Tethered Python Sample (click for code!)
loading...
Arduino
It is possible to load the Arduino software on any DUELink module. This will allow the module to run Standalone. In this example, we are using DUELink modules similar to how we would use any Qwiic, STEMMA, or Modulino modules. They all use I2C, but the main difference here is that DUELink module are smart and understand text commands. You could send these commands manually but we have provided libraries to help further.
You can now visit the Getting Started page to see how to blink STAT LED using Arduino.
Controlling other modules is as simple, you just need to select which module you are talking to.
// Blink the Status LED fast on device 1, 10 times
duelink.Engine.Select(1)
duelink.System.StatLed(200,200,10)

// Blink the Status LED slow on device 2, 50 times
duelink.Engine.Select(2)
duelink.System.StatLed(400,400,50)
Statled() is a standard library function, meaning this is a standard function that is found on all modules. Also, each module has a Driver script that simplifies tasks. For example, when using an accelerometer, the driver may provide AccelX() function that provides that functionality. This eliminates the need for the user to know about the accelerometer's internals.
Each module's page includes a tab for the Driver API. For examples, there is Light() driver function that returns the ambient light level.
The Tethered Sample Arduino tab on Essentials Kit Product page has a full example to get you started. Here it is to help you out:
Arduino Tethered Sample (click for code!)
loading...